Trusted Research Environment User Guide - Applicable for version 6.2.1
Trusted Research Environment (TRE) is a cloud solution that provides secure access to data, tooling, and compute power that researchers need. Researchers can focus on achieving research missions and completing essential work in minutes in a trusted research environment.
Getting Started
Sign Up
Use this section if this is your first time connecting to the system.
- Open your browser and navigate to TRE URL.
- Click on the Sign up link.

- Fill out your Username (email address), Name, Family name and pick a Password.

- Click the Sign up button.
Login
- Open your browser and navigate to TRE URL.
- Type in your Username (the email you used to sign up) and your Password.
- Click the Sign In button.
User Interface

Dashboard - Displays AWS charges over the past 30 days
SSH Keys - SSH Keys for EC2 authorization
Workspaces - The combination of a study with a compute
Studies - Data sets saved in Amazon S3
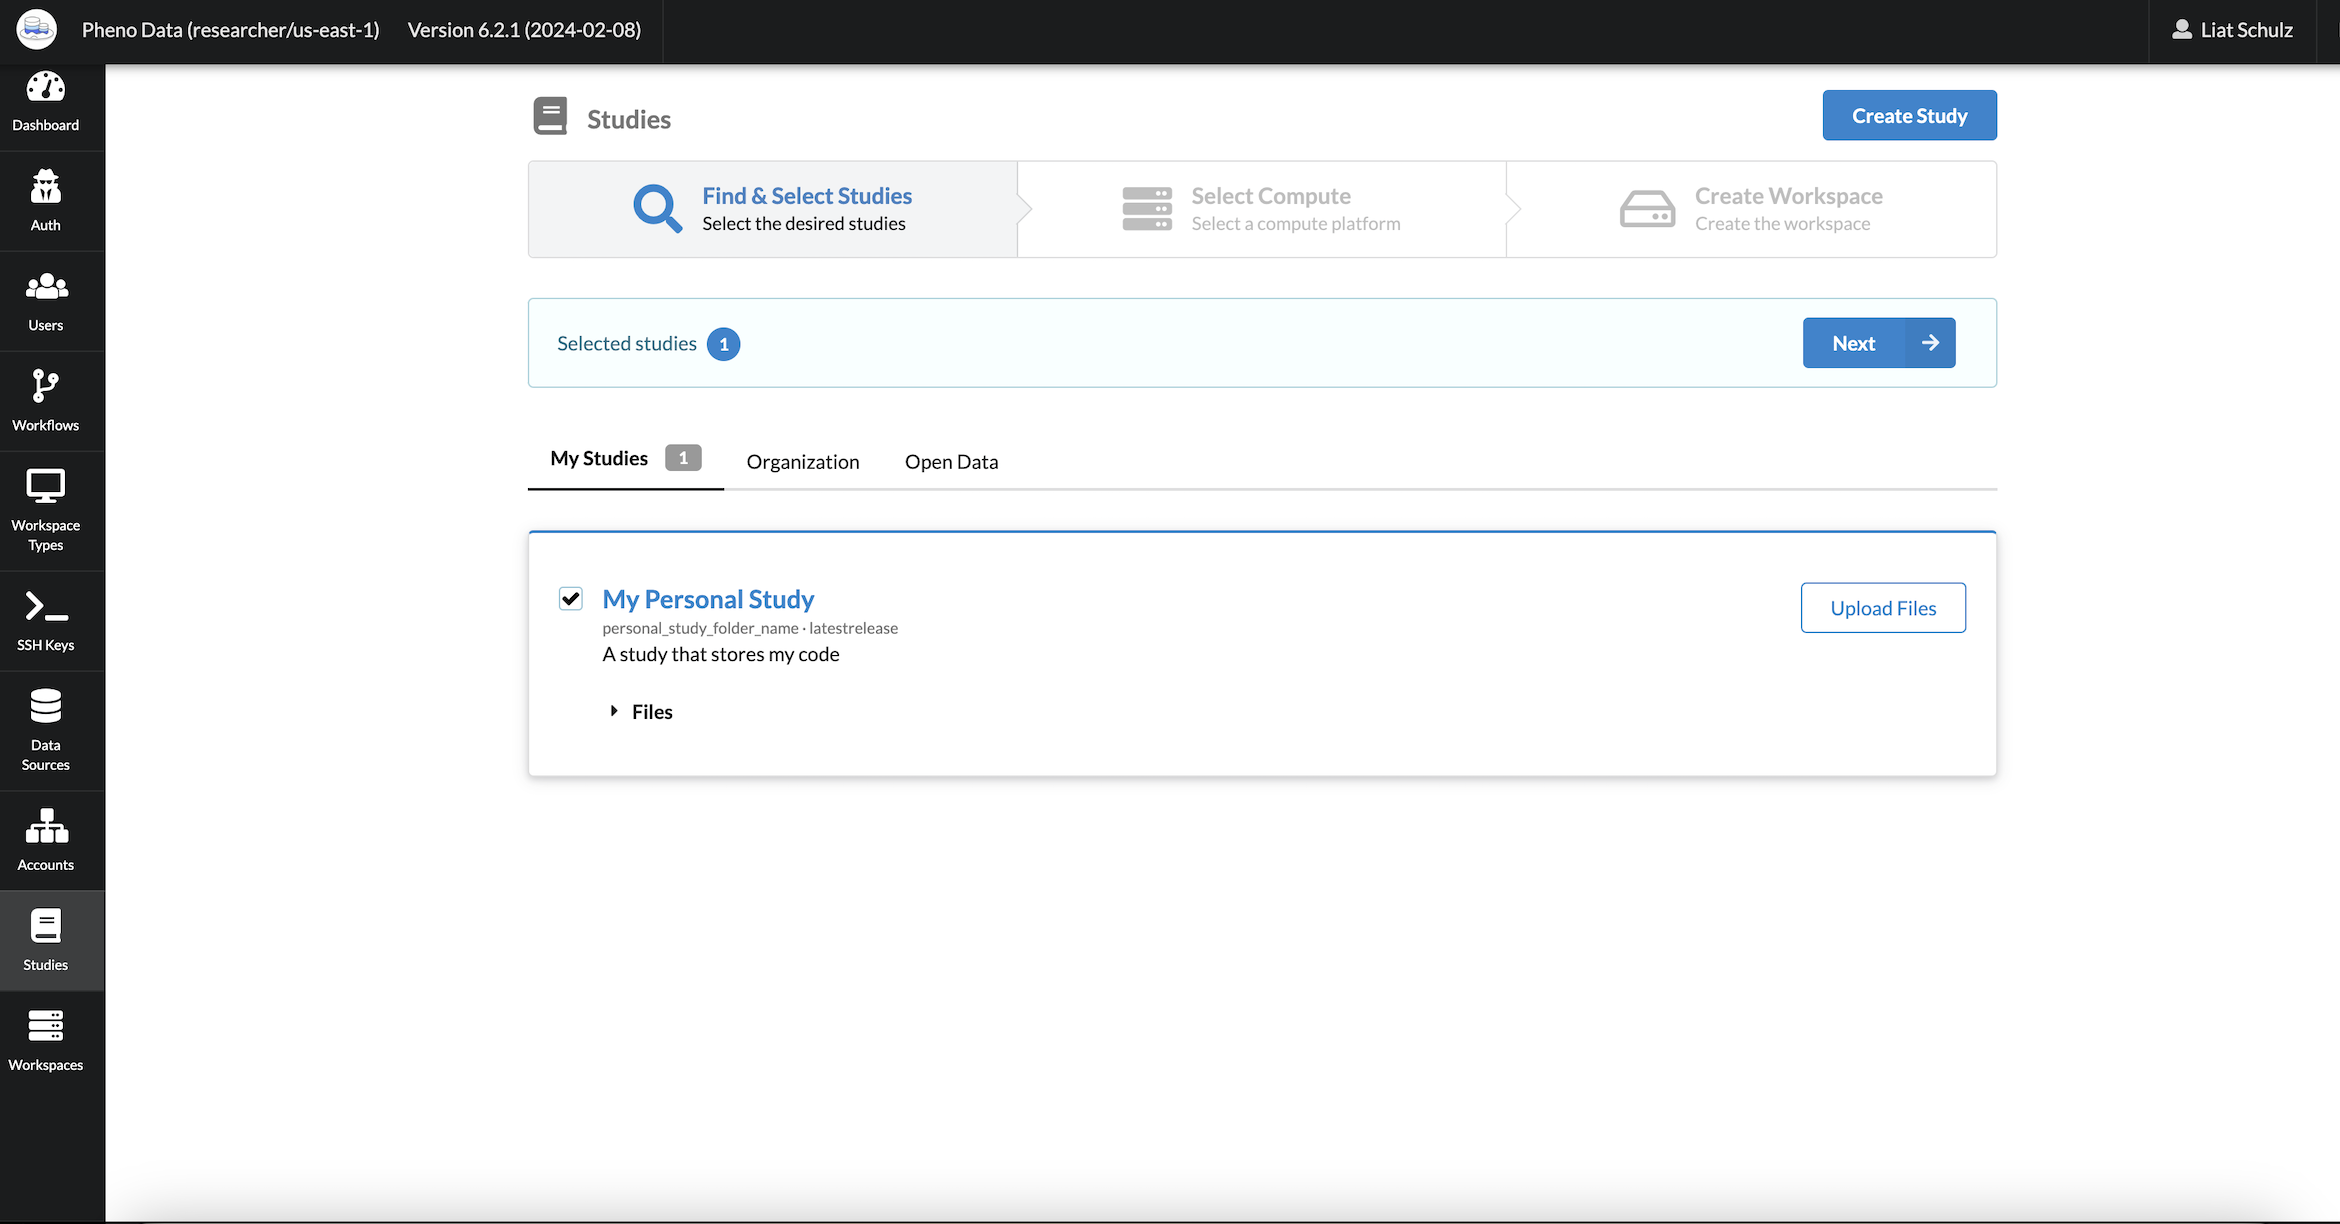
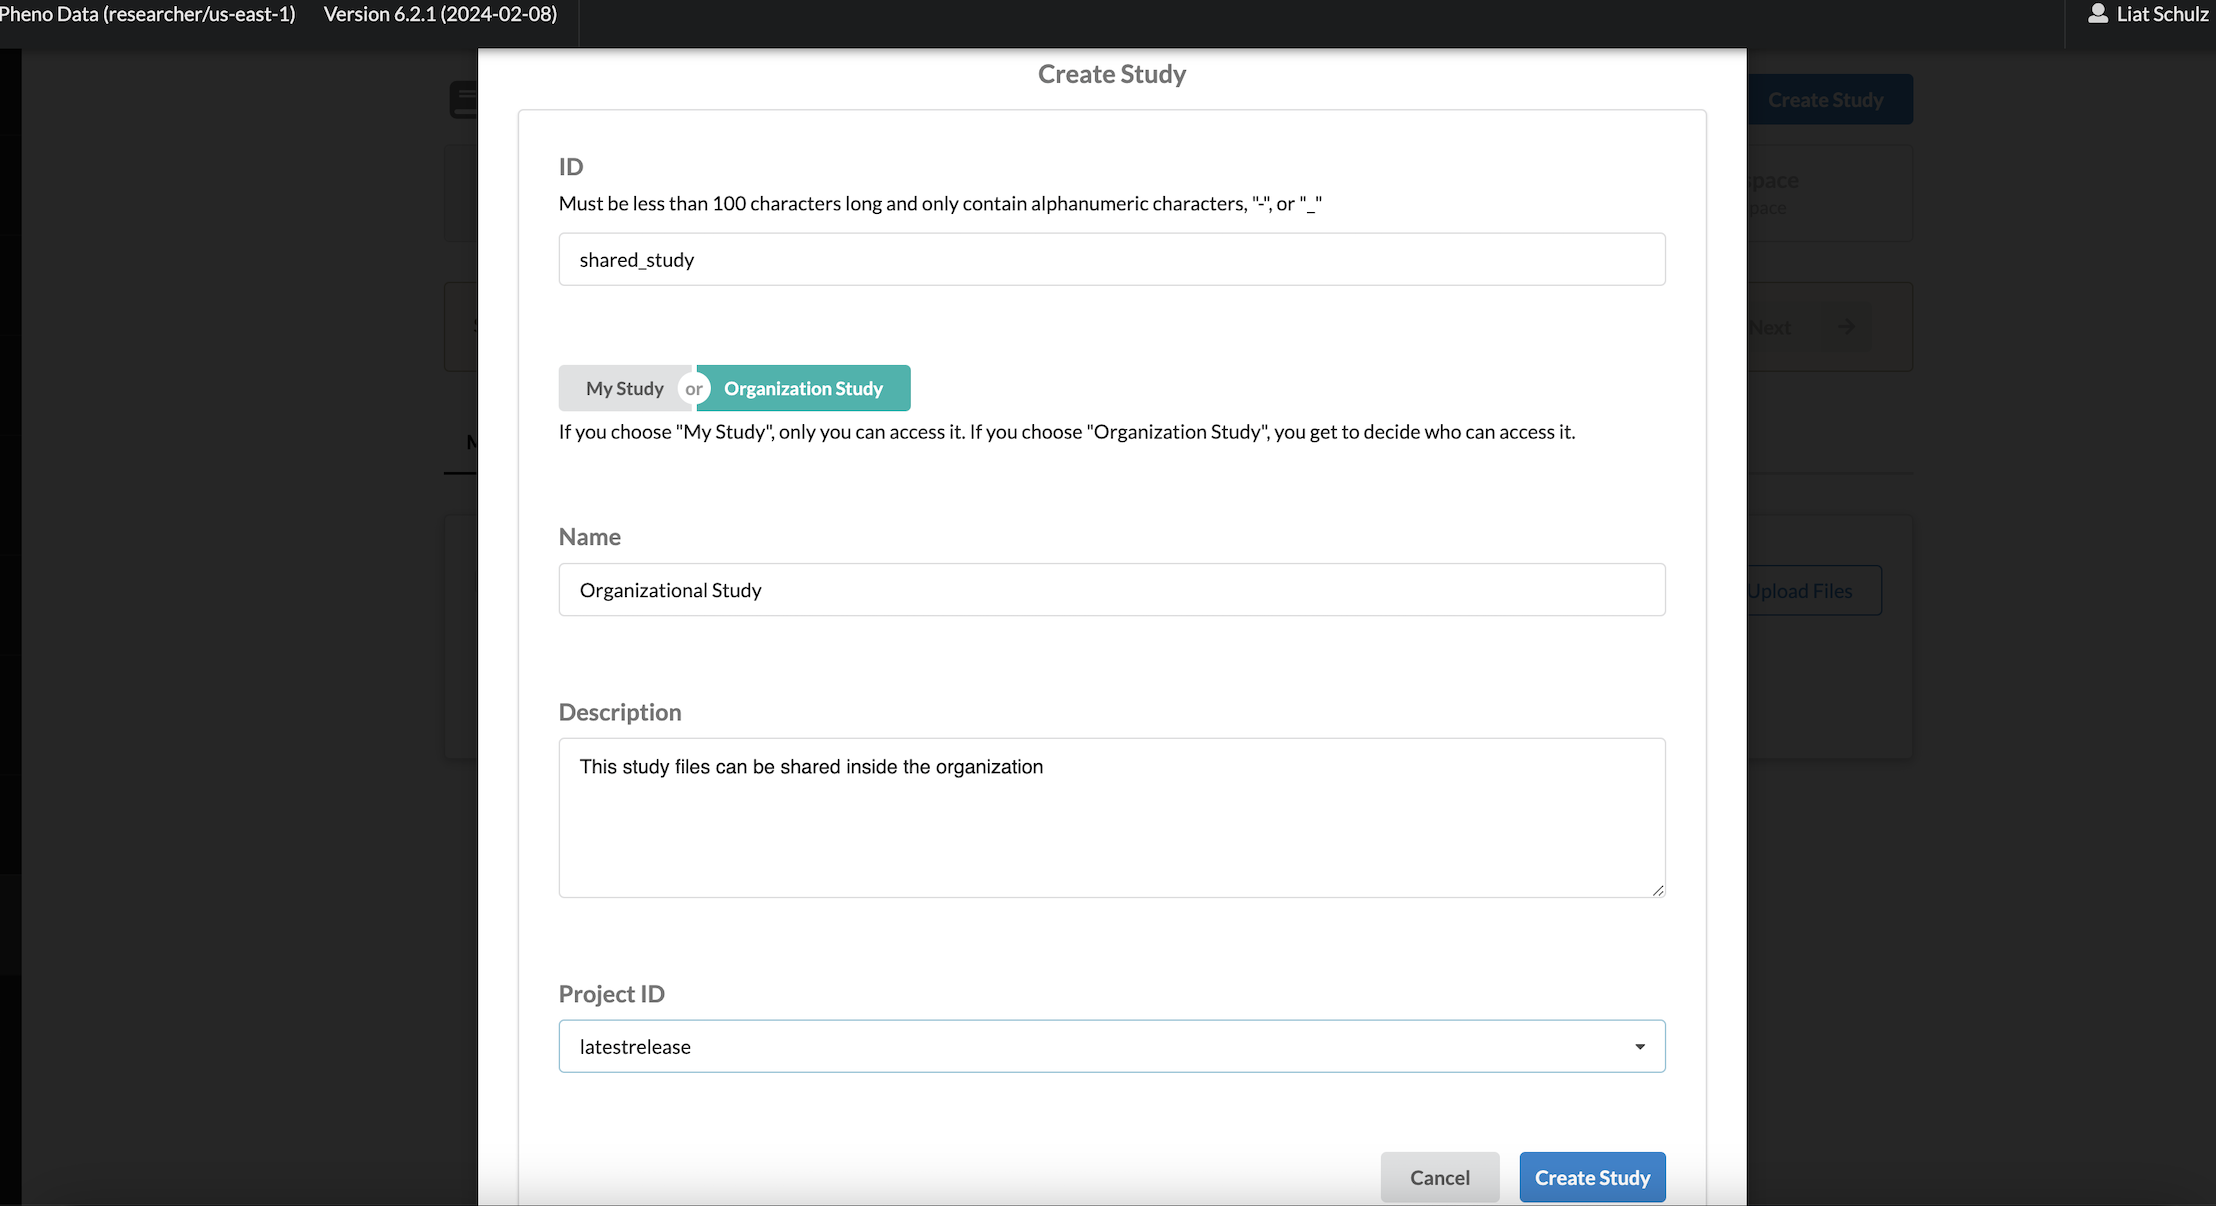
Personal Study
- Click on Create Study
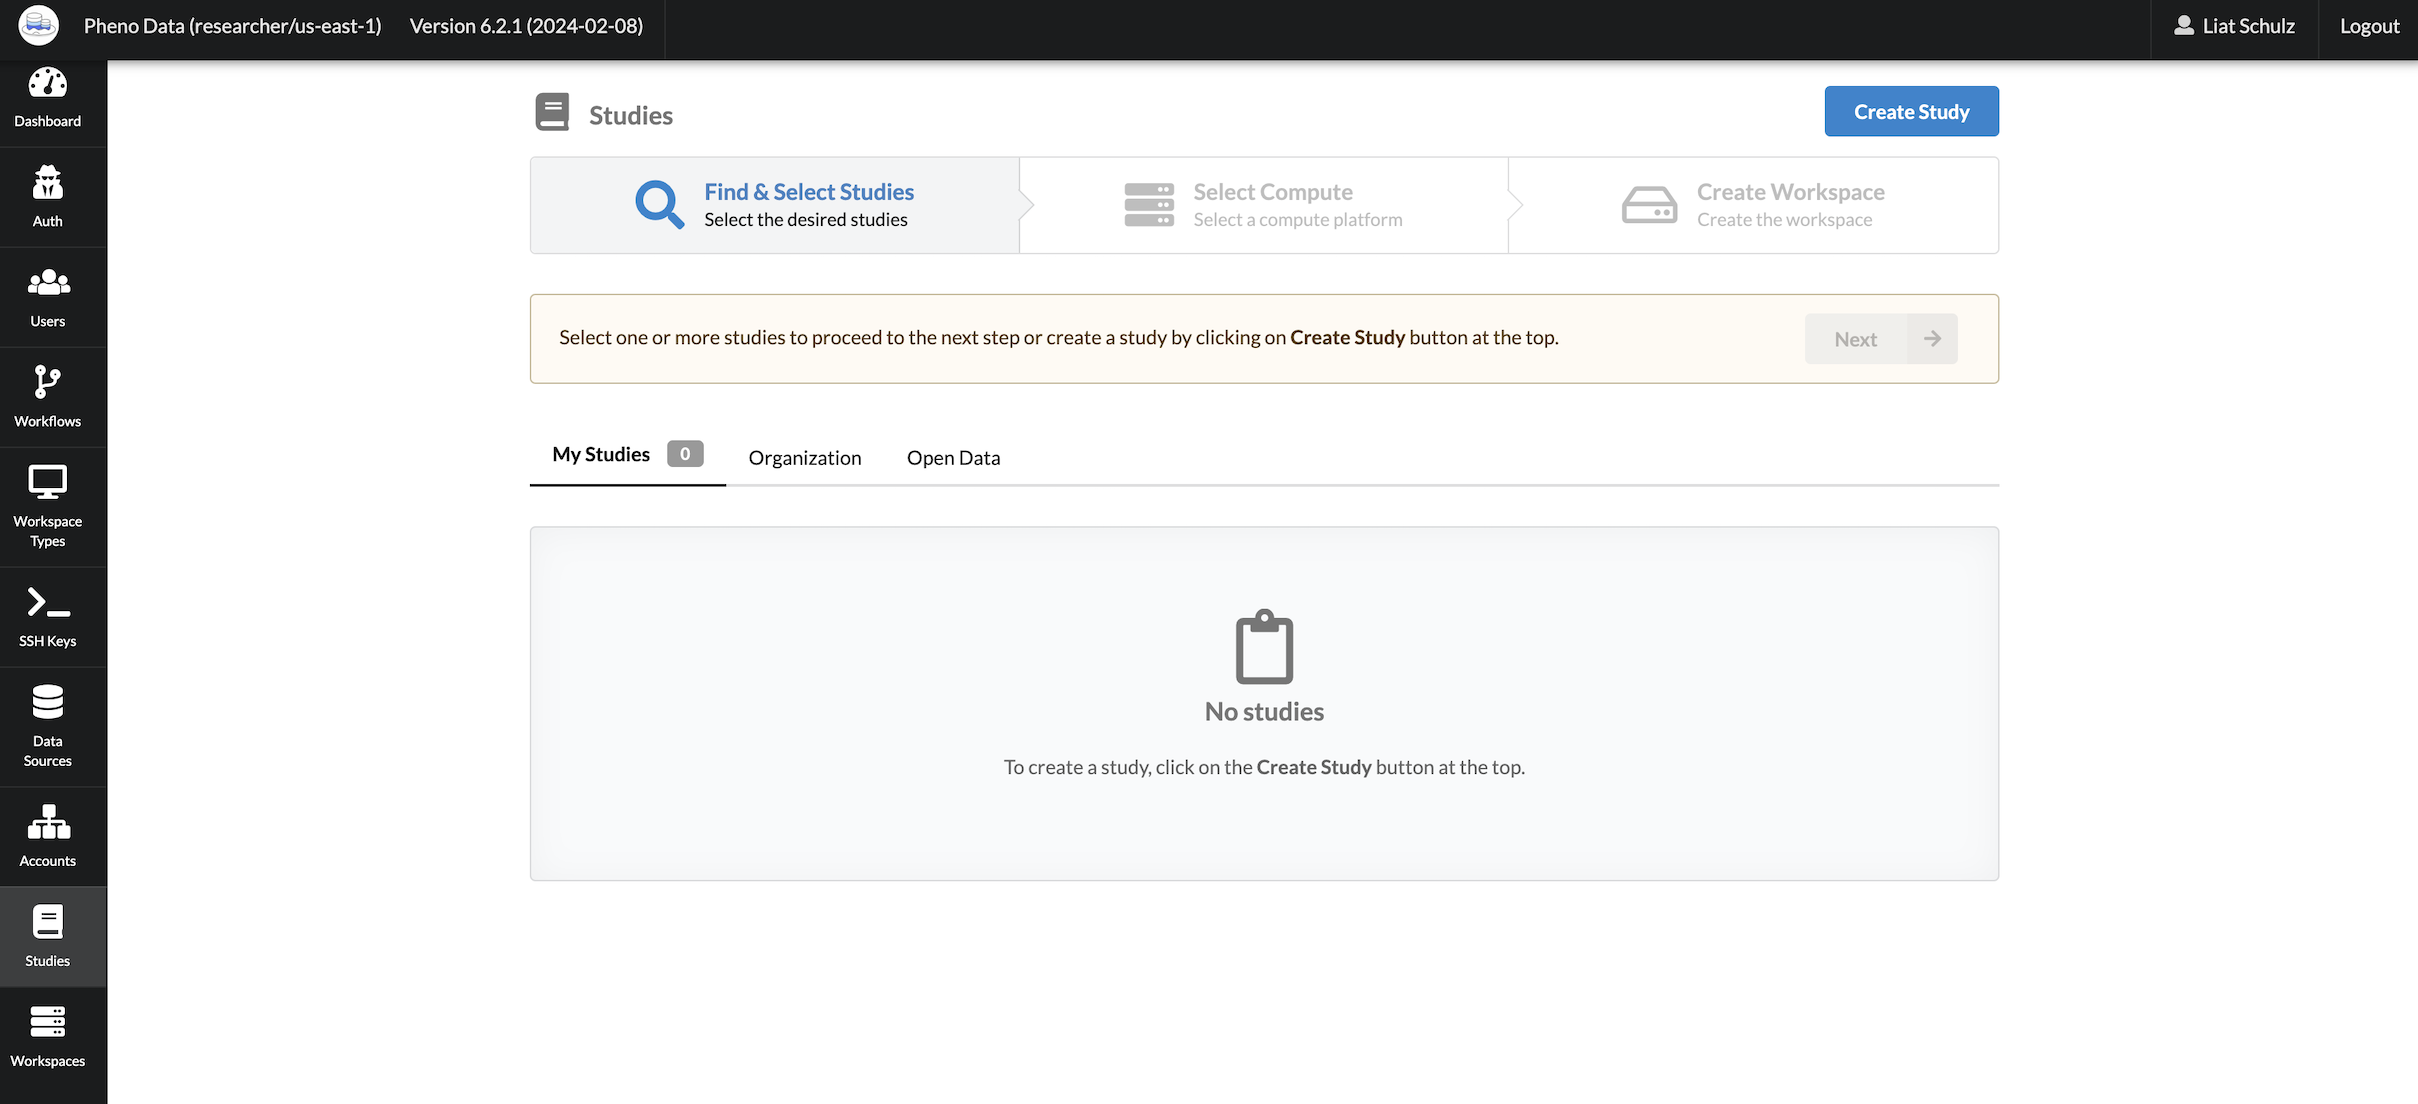
- Fill up all the fields and press Create Study myStudy for personal and Organziation study for Org Studies
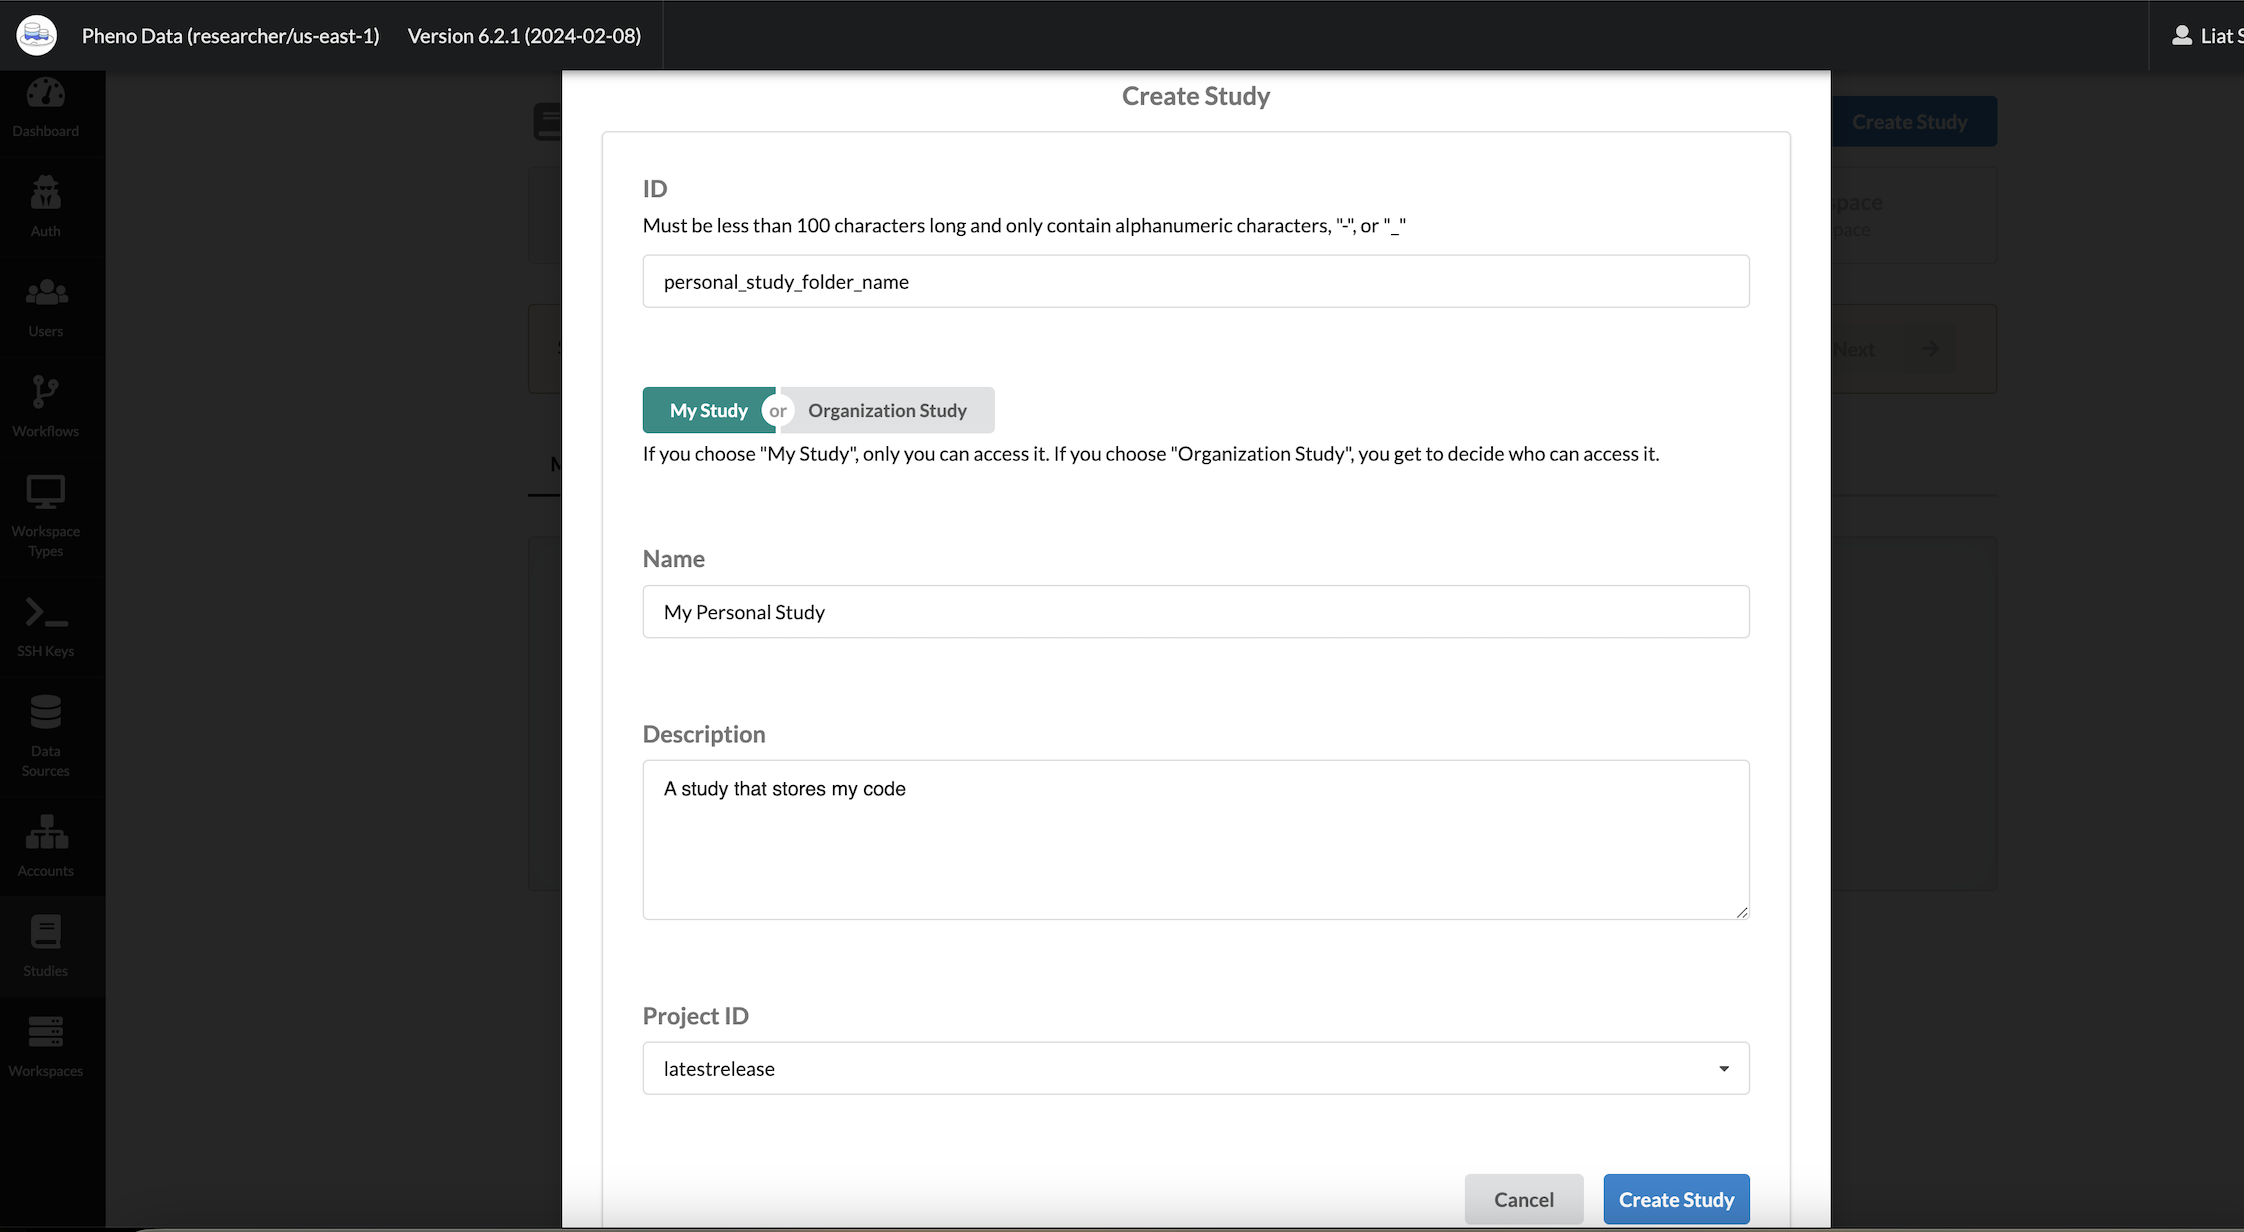
- Study Created and ready to use
Organizational Study
Using Trusted Research Environment
Launching a new Research Environment
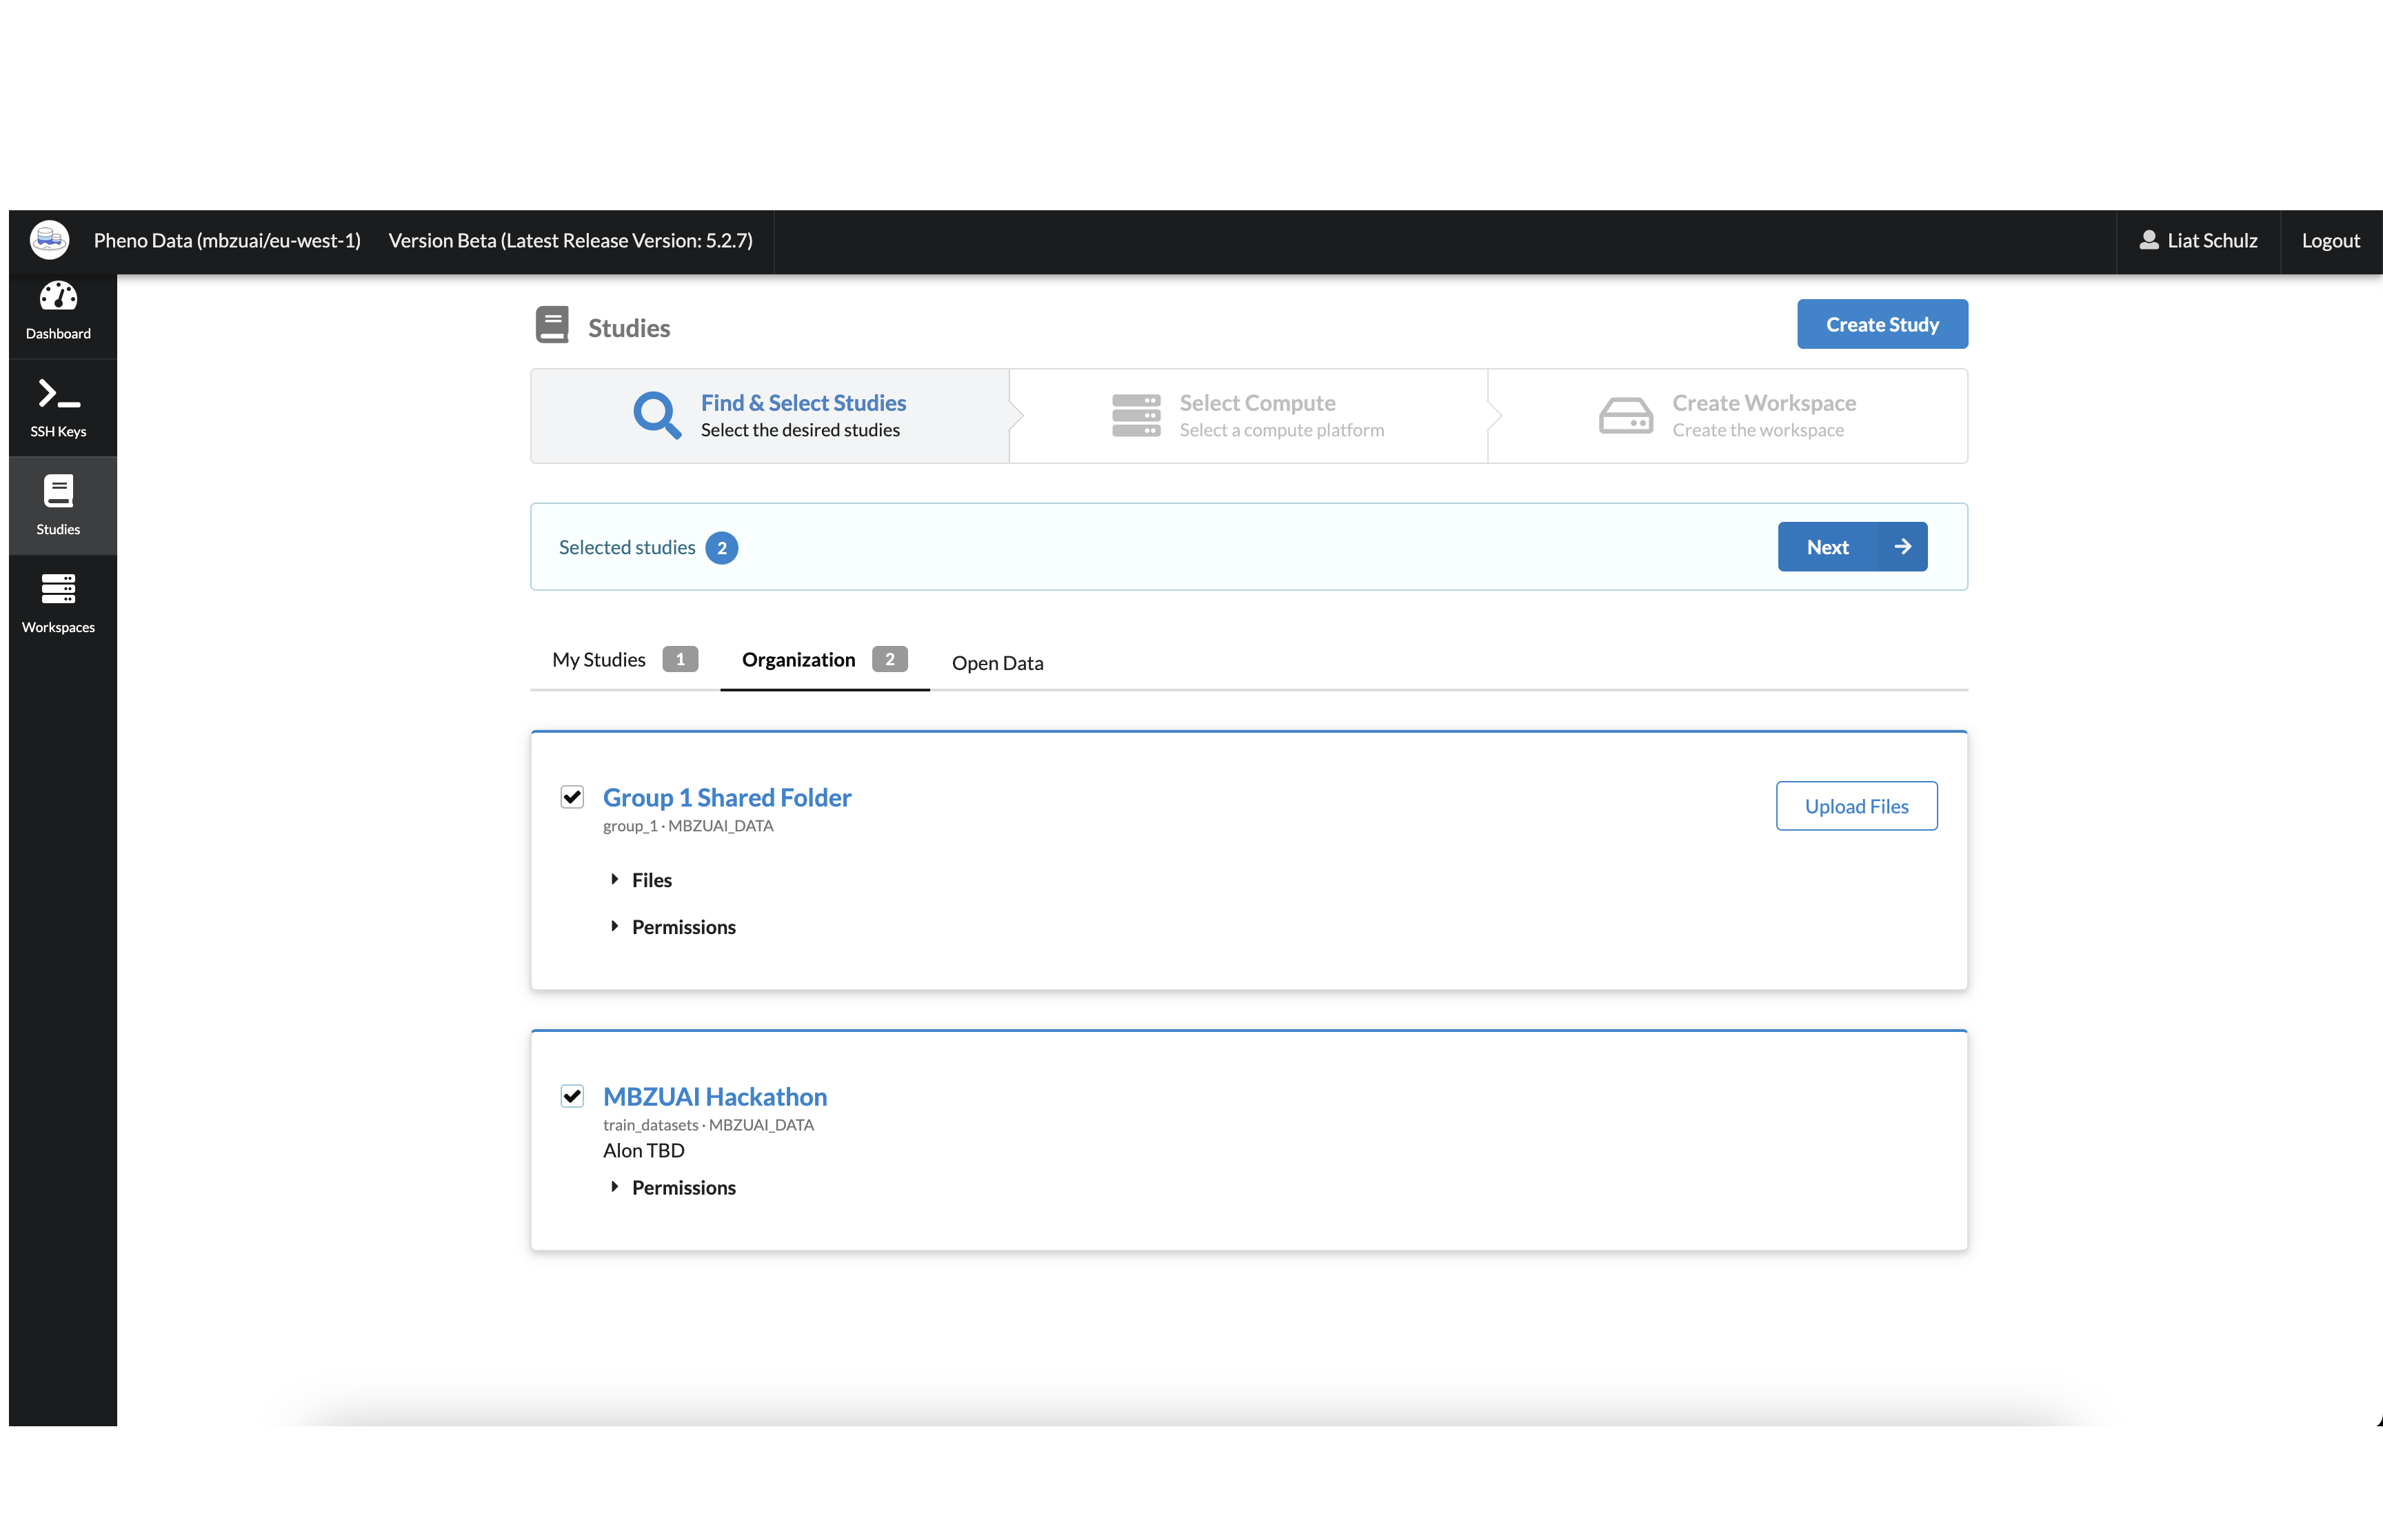
A user can select a Study or multiple Studies and launch a Workspace to access and analyze data. To launch a Research Environment, follow these steps:
- In the portal navigate to the Studies page using the menu on the left.
- Select the Studies to be attached to the new Workspace.
- Once you have selected all the Studies you want, click the Next button.
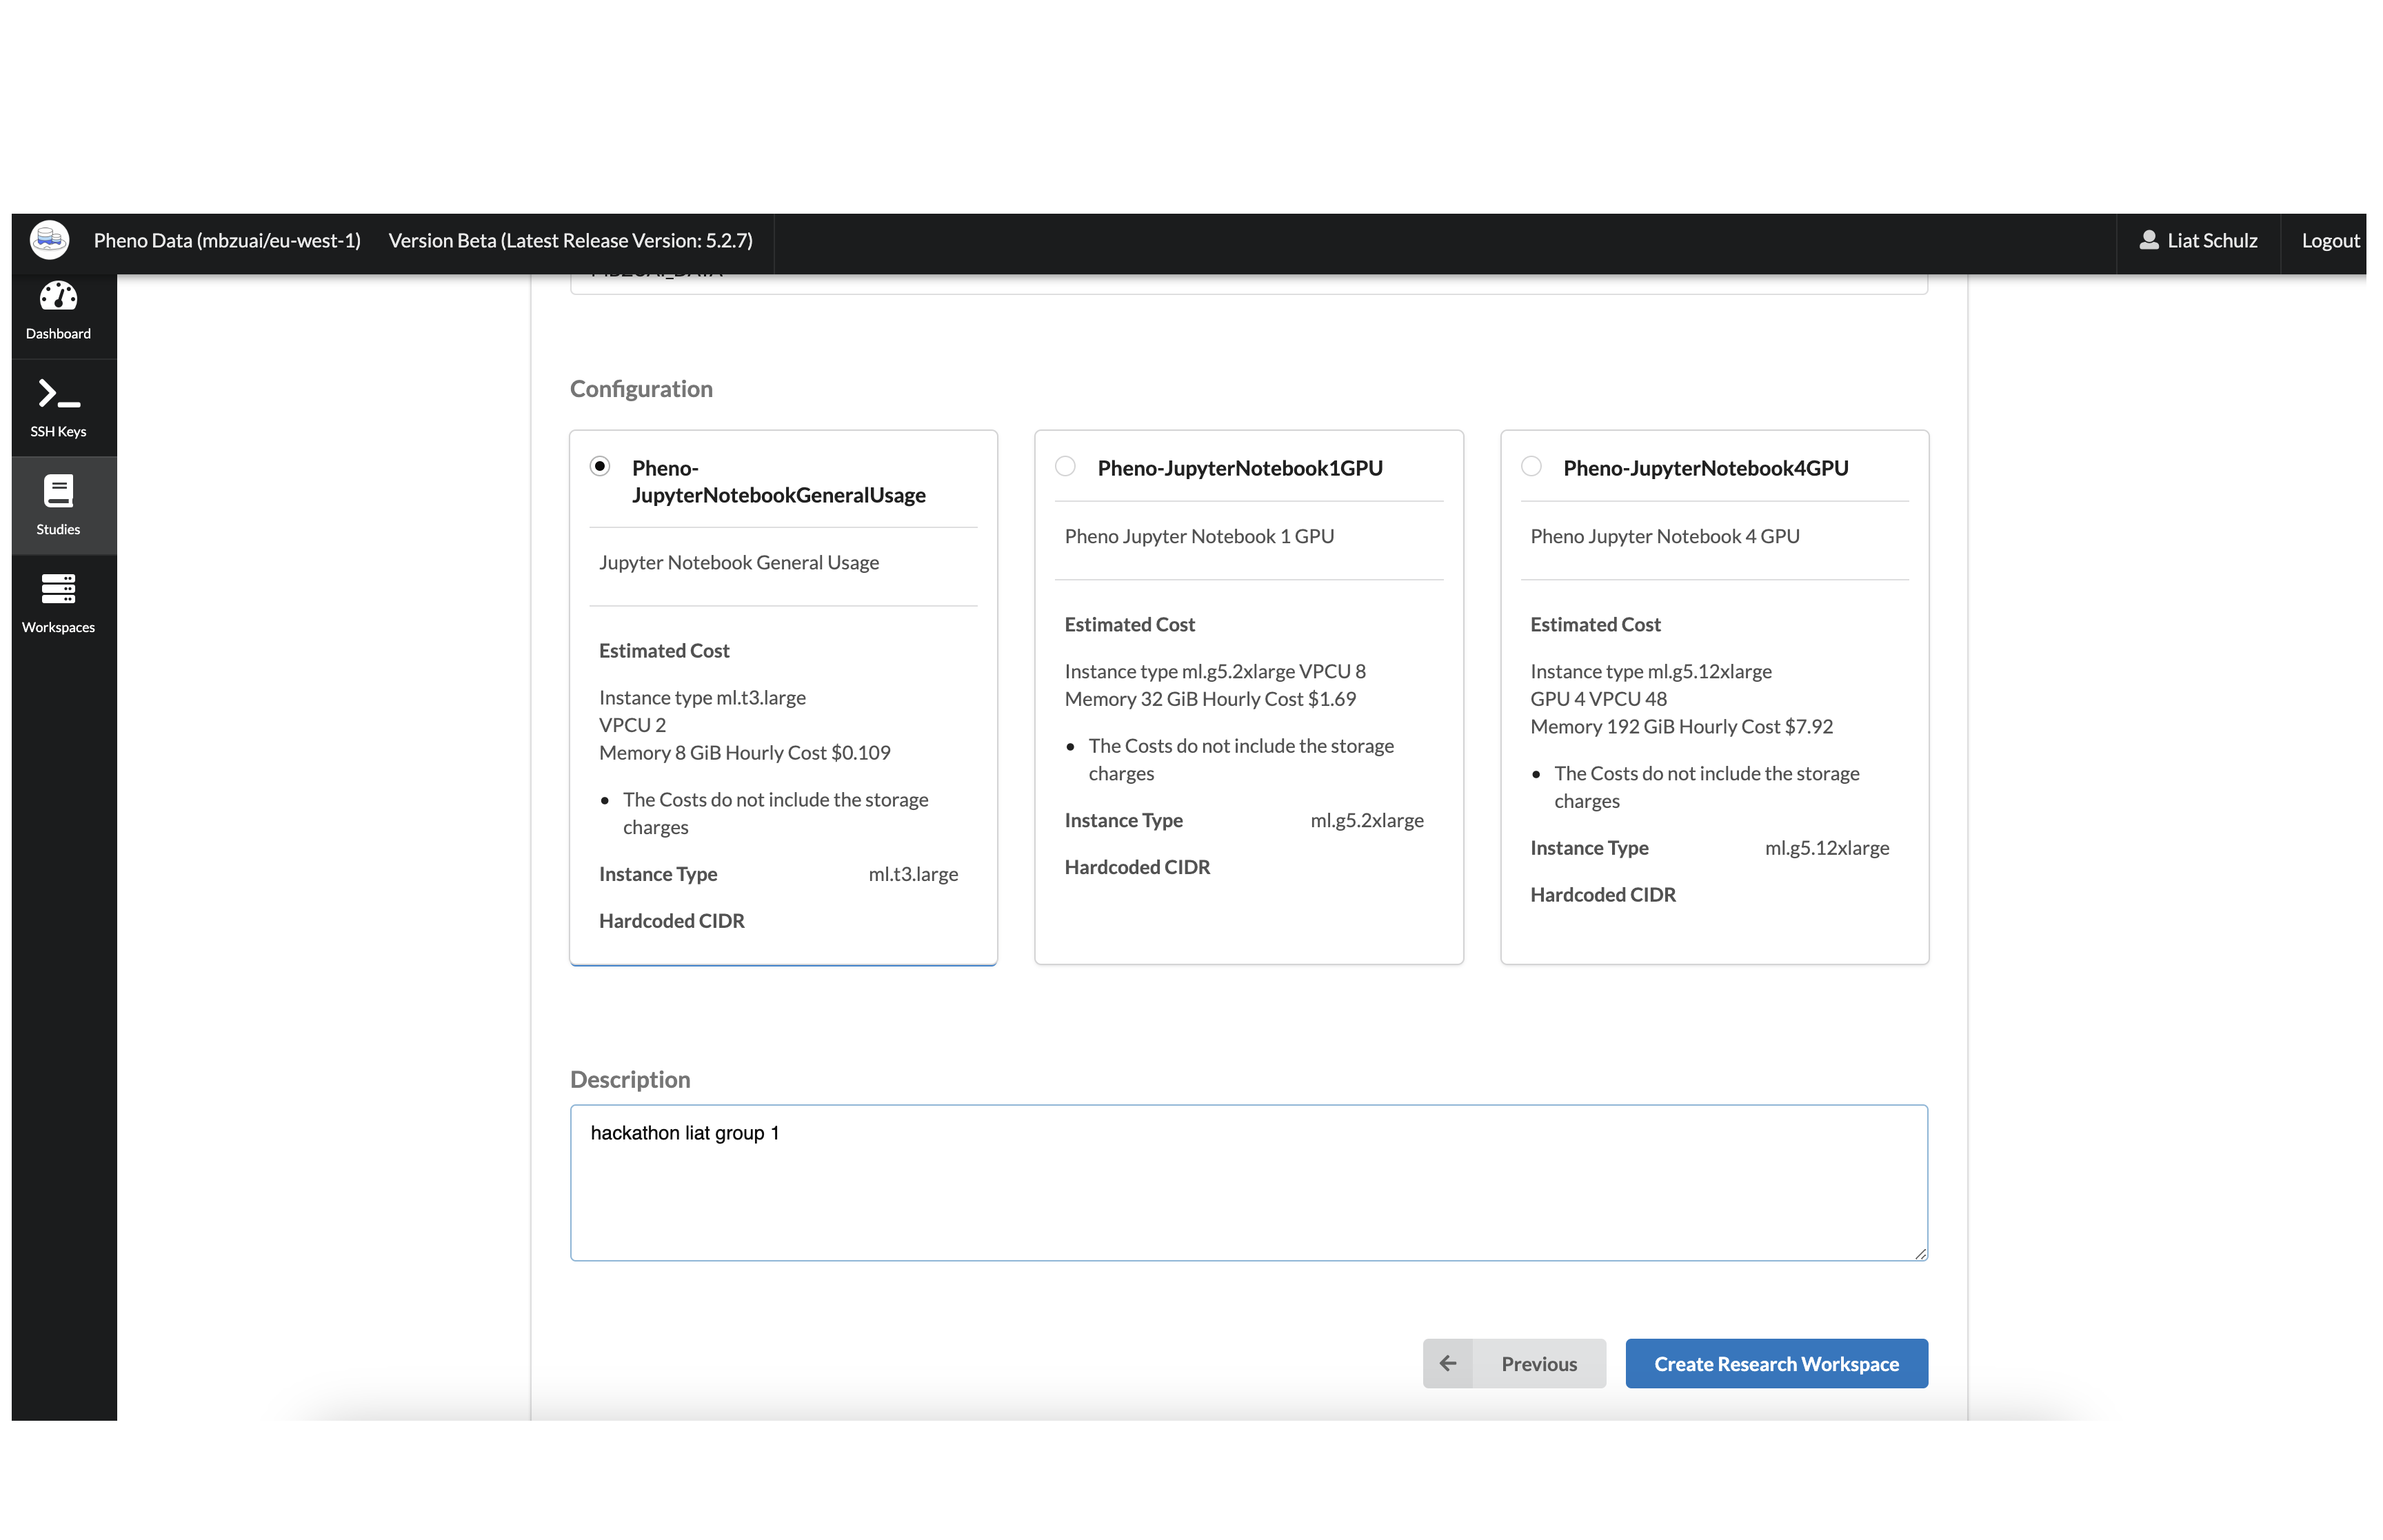
- Choose the type of Workspace you want and click the Next button.

- Fill in the Workspace Name field.
- Select your project in the Project ID drop down field.
- Select the Configuration type according to your needs.
- Type a description for the Workspace in the Description field.
- Click the Create Research Workspace button.

This will deploy the new Workspace and attach the Studies that were selected.
You will automatically be redirected to the Workspaces tab on the portal.
Wait for the workspace to be Available.
Connecting to EC2
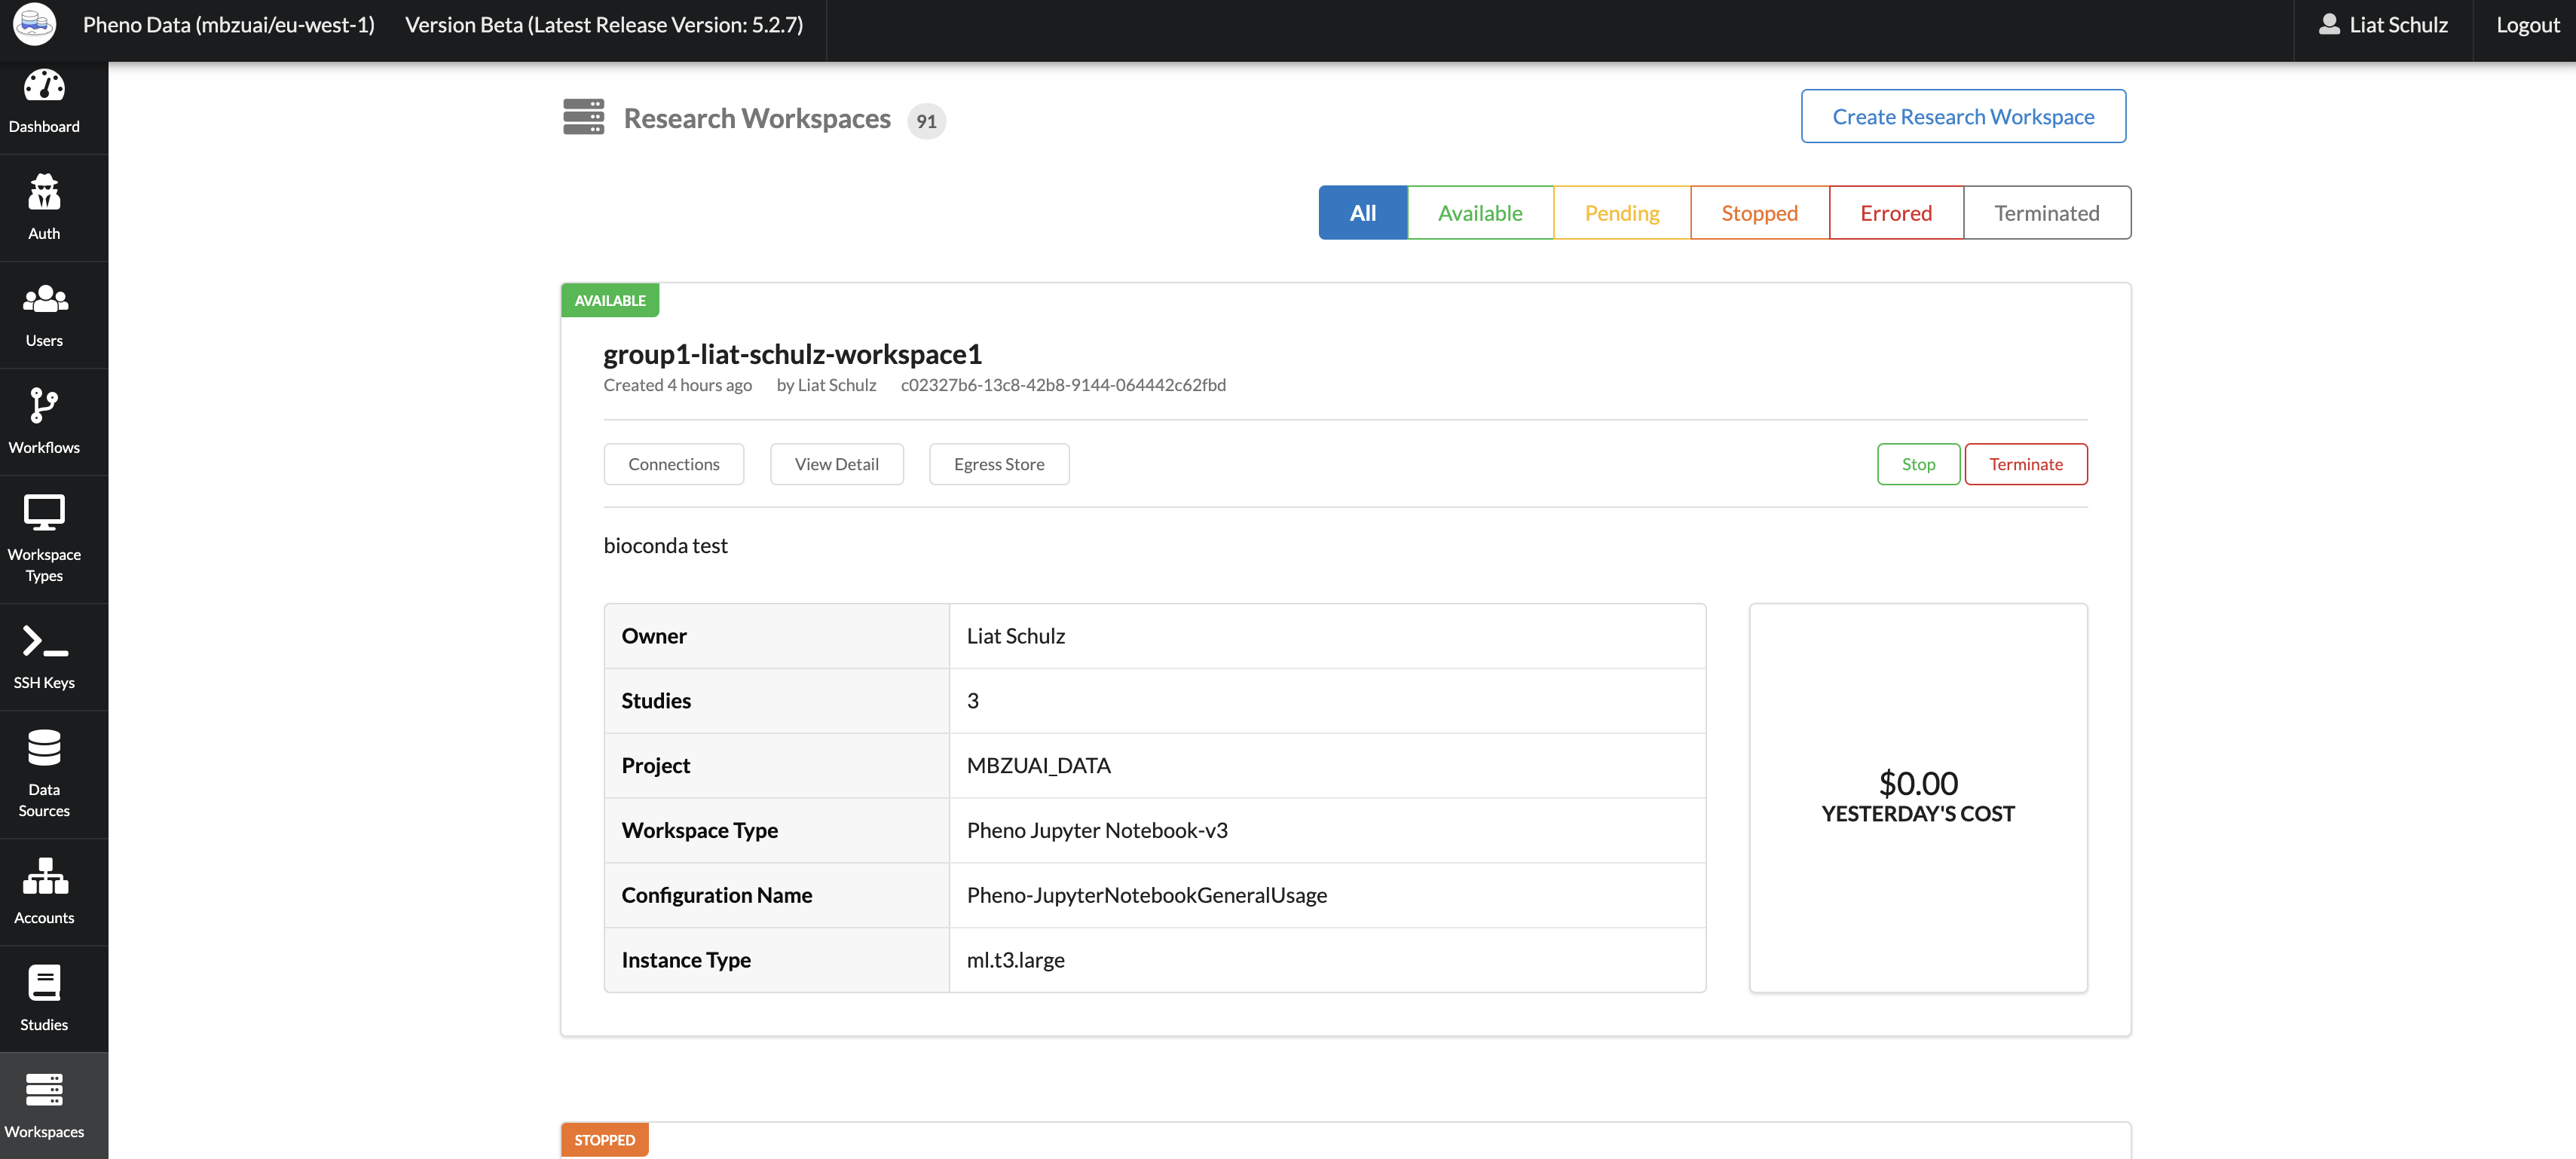
- In the portal navigate to the Workspaces page using the menu on the left.
- Click on the Connections button, below the Workspace name.
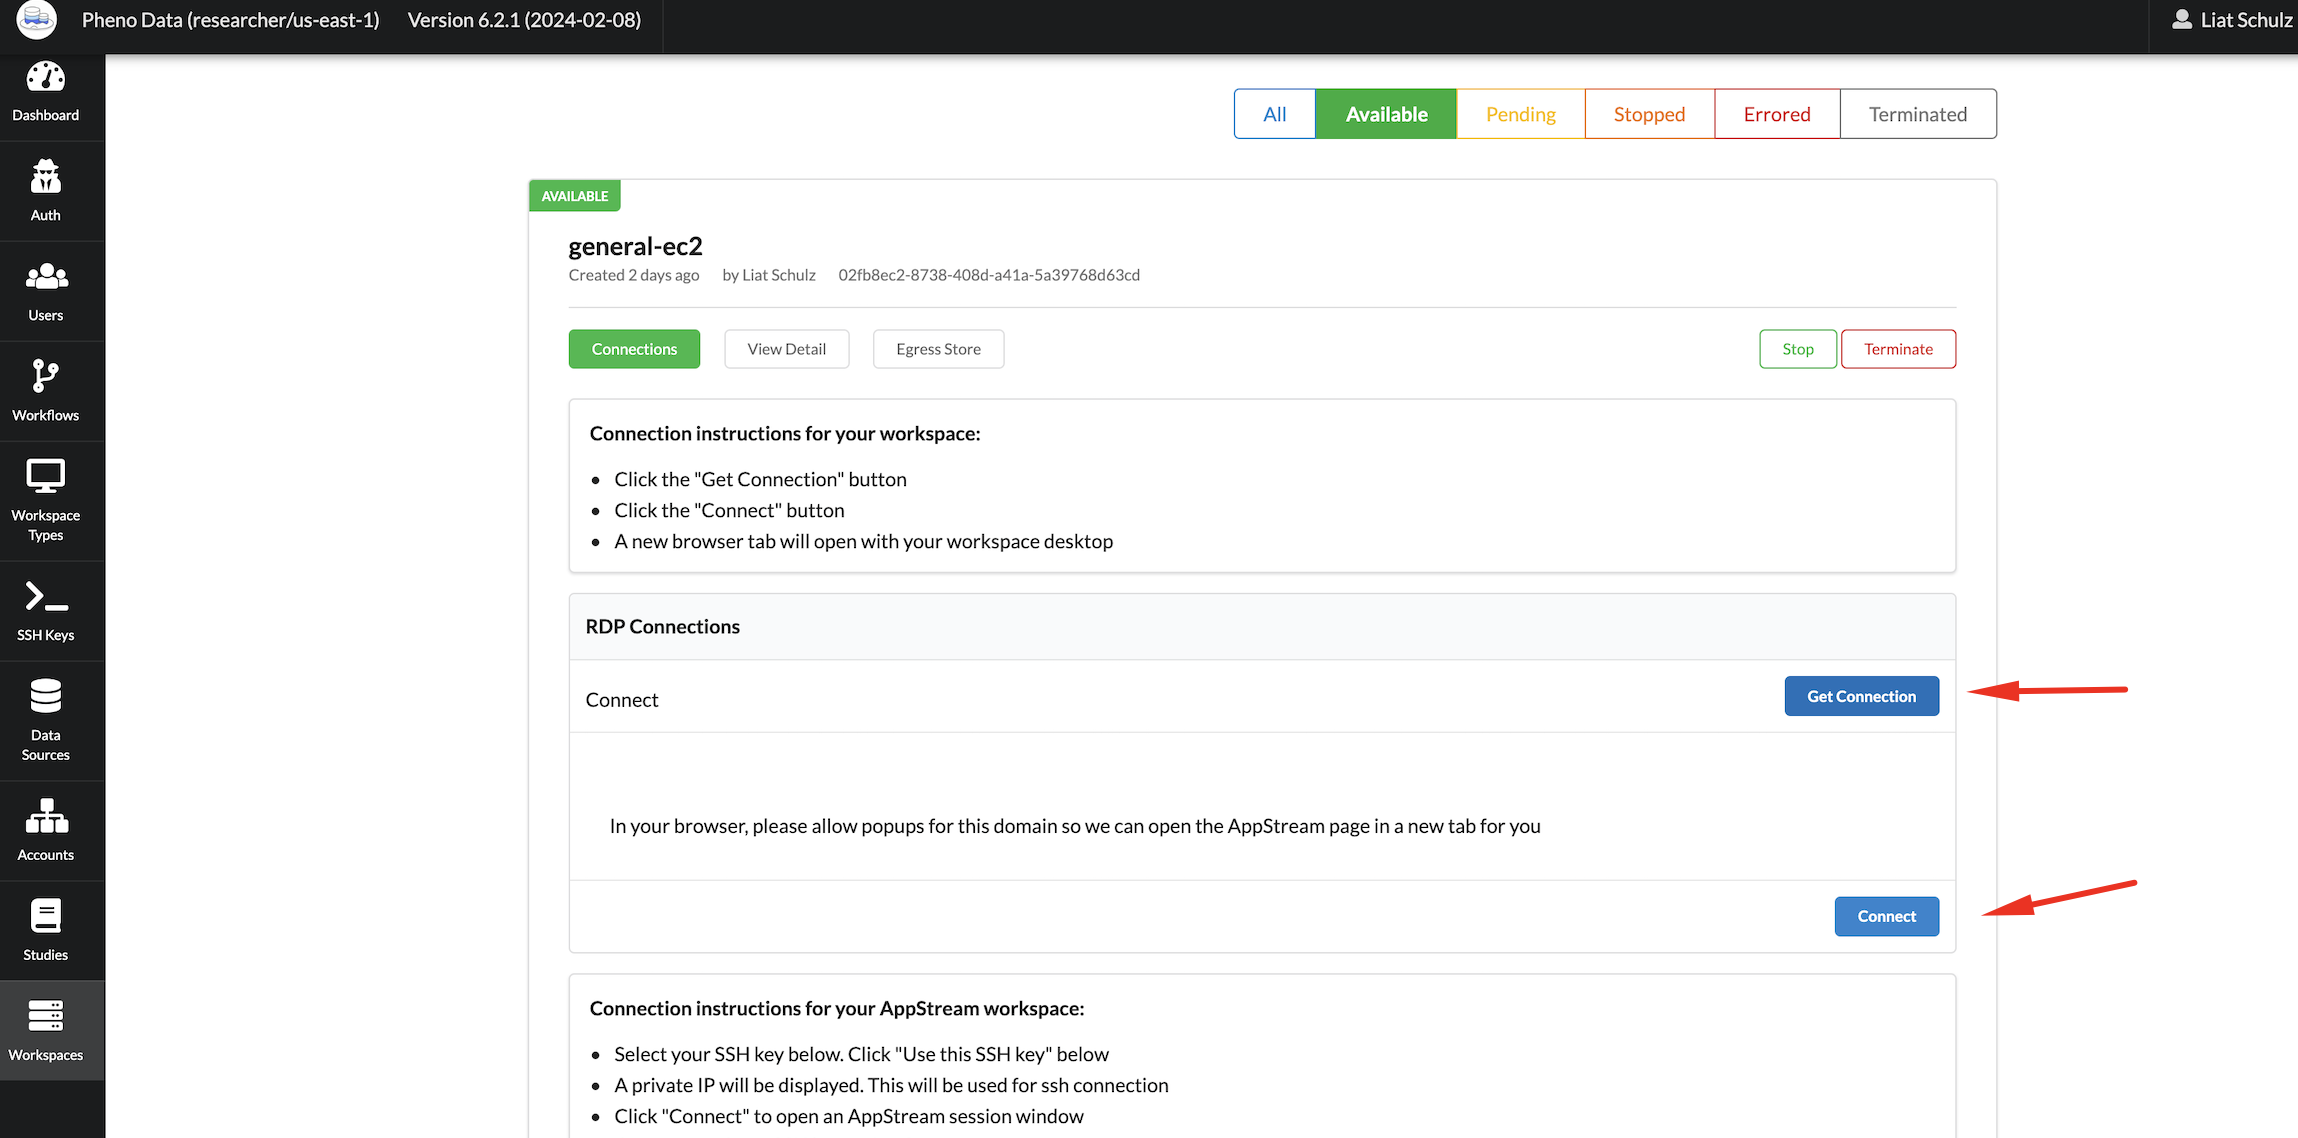
Connecting to an Existing Research Environment
- In the portal navigate to the Workspaces page using the menu on the left.
- Click on the Connections button, below the Workspace name.
- Click on the Generate URL button on the right, under HTTP Connections.
- Click Connect.
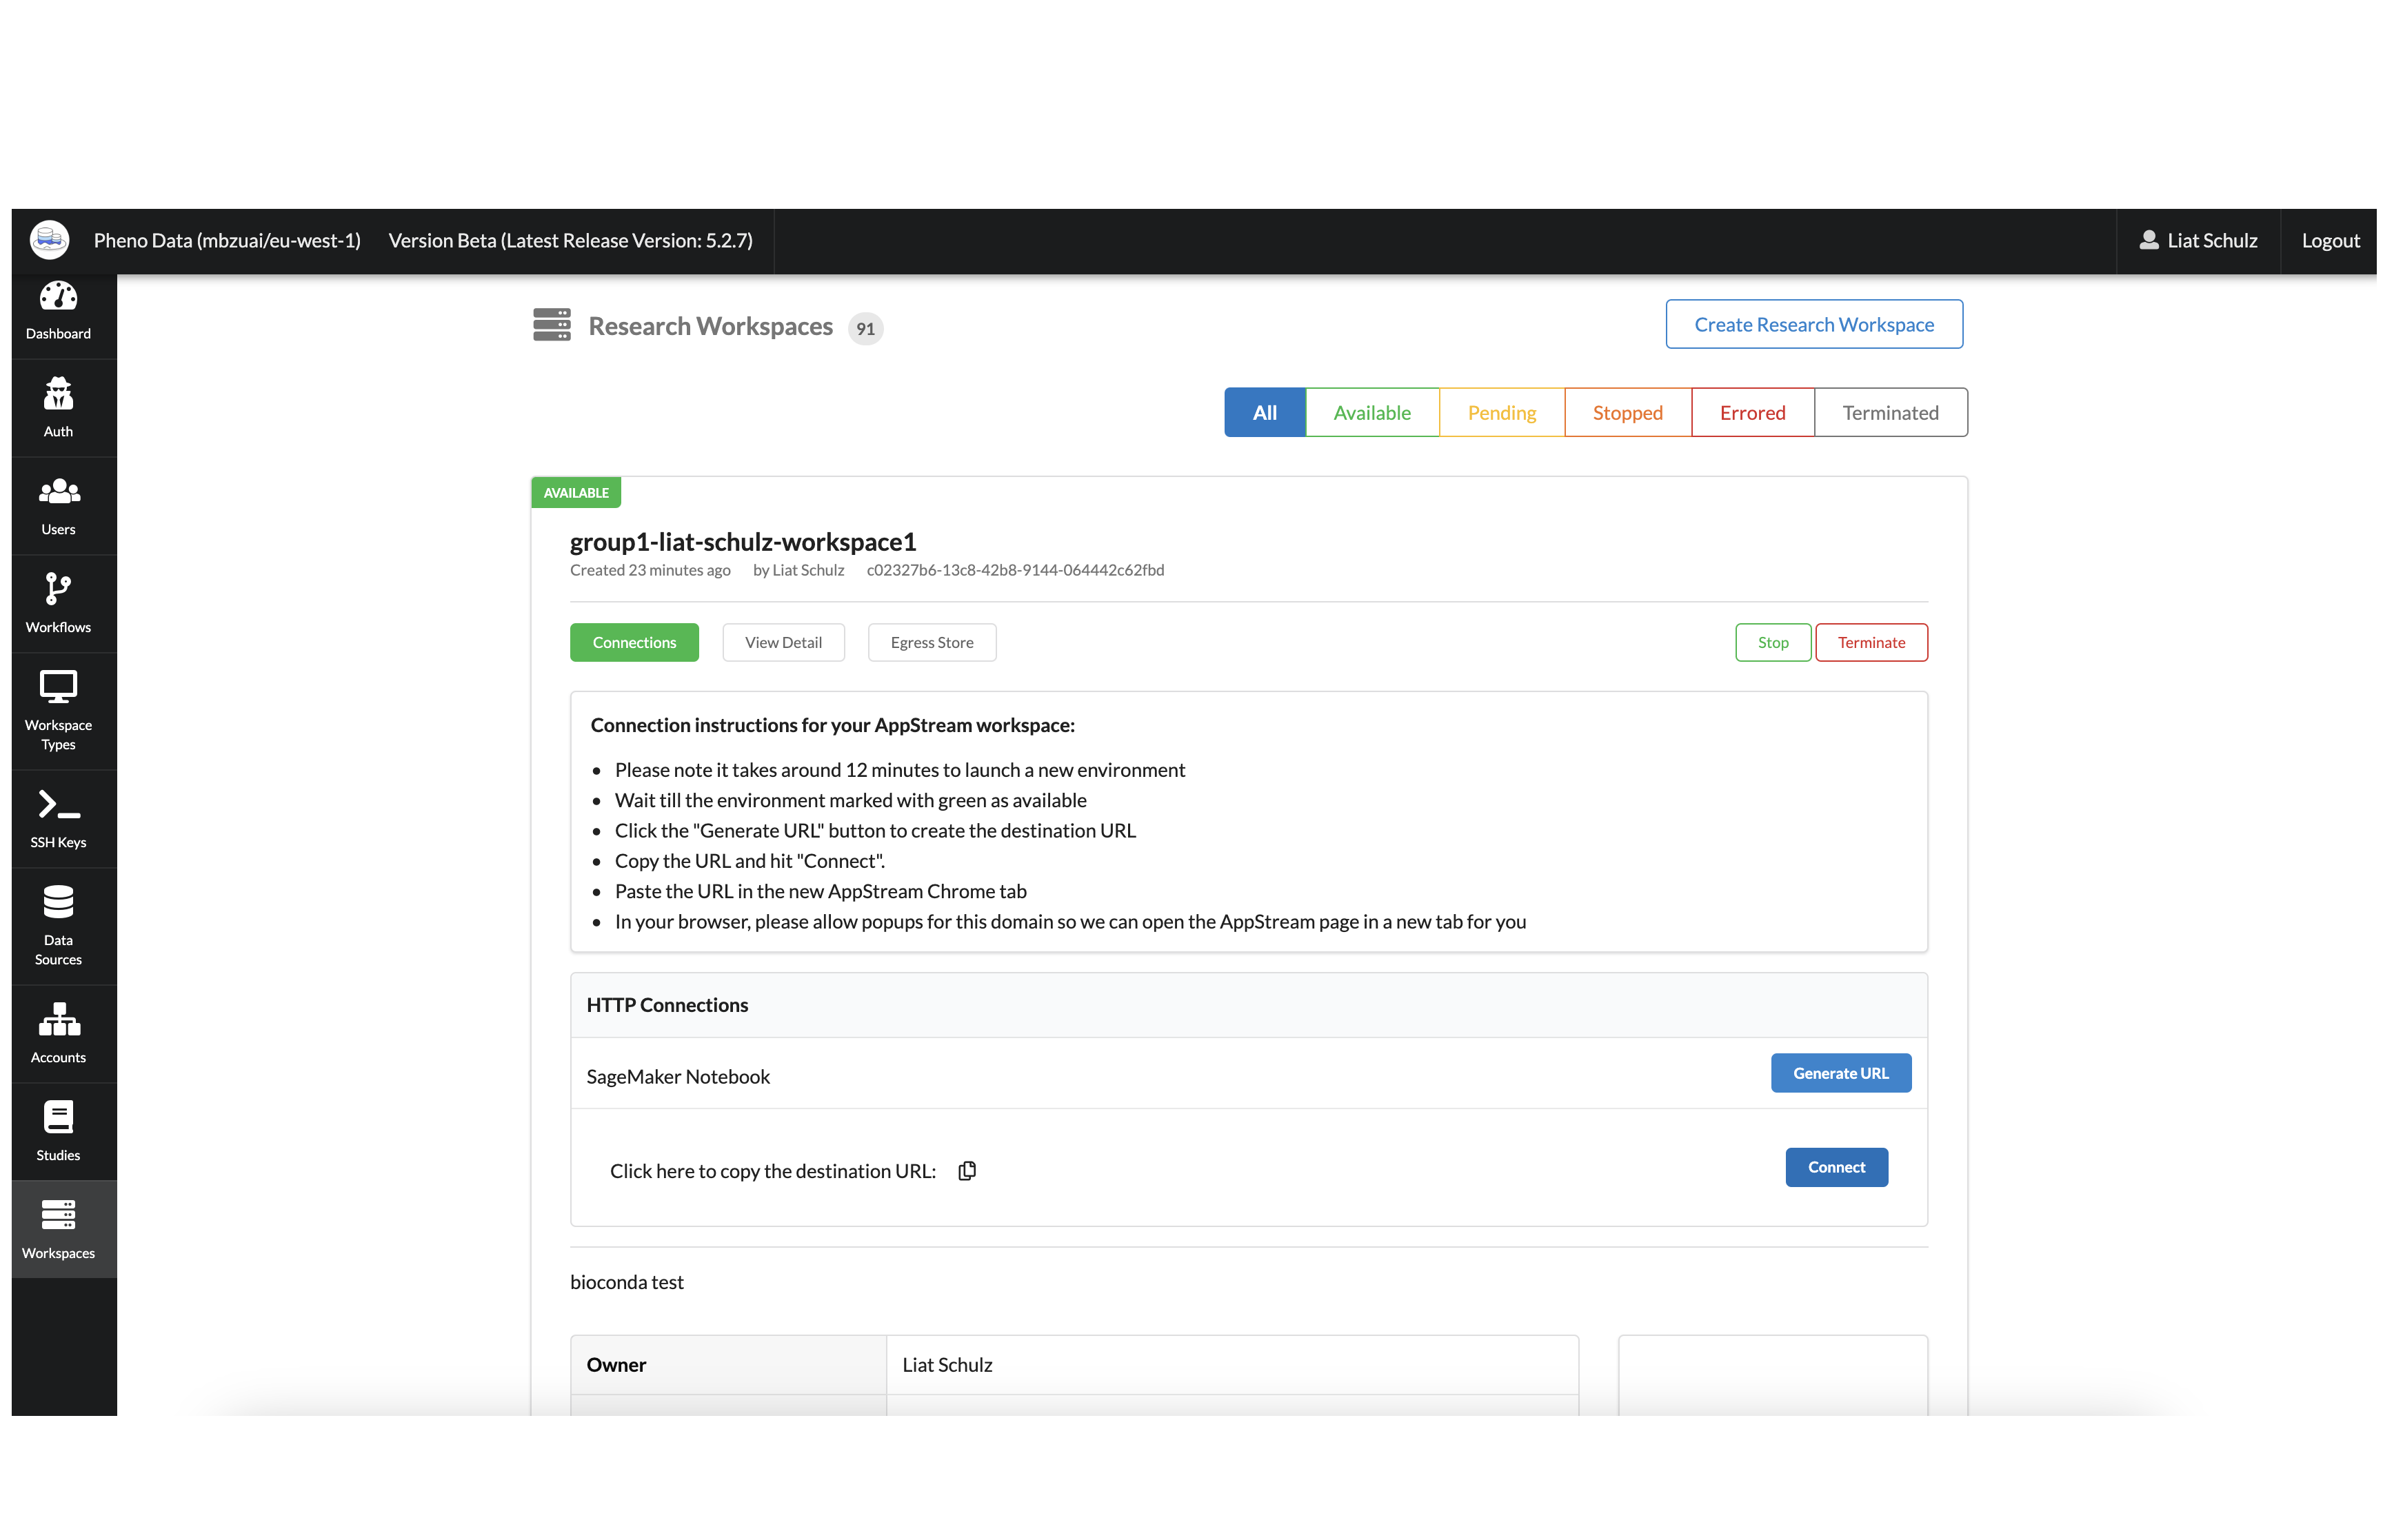
- Wait for the system to load.
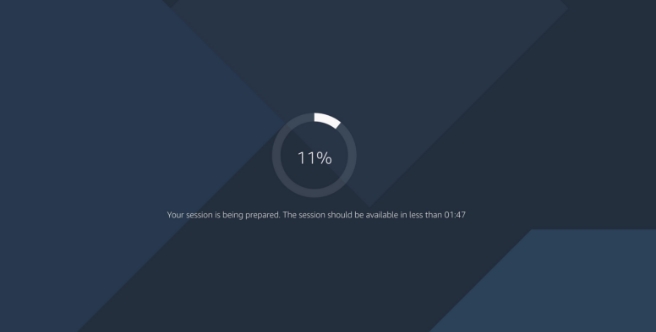
It will now open the browser with the data and the tools to start working. It will open in Firefox automatically if the workspace created in a Notebook, or Remmina Client(Remote) in case it created in EC2. So you can do the following:
Installing Python Packages
- Connect to the Research Environment and open your Jupyter Notebook (See: Connect to an Existing Research Environment)
- Click on Open JupyterLab on the top right.
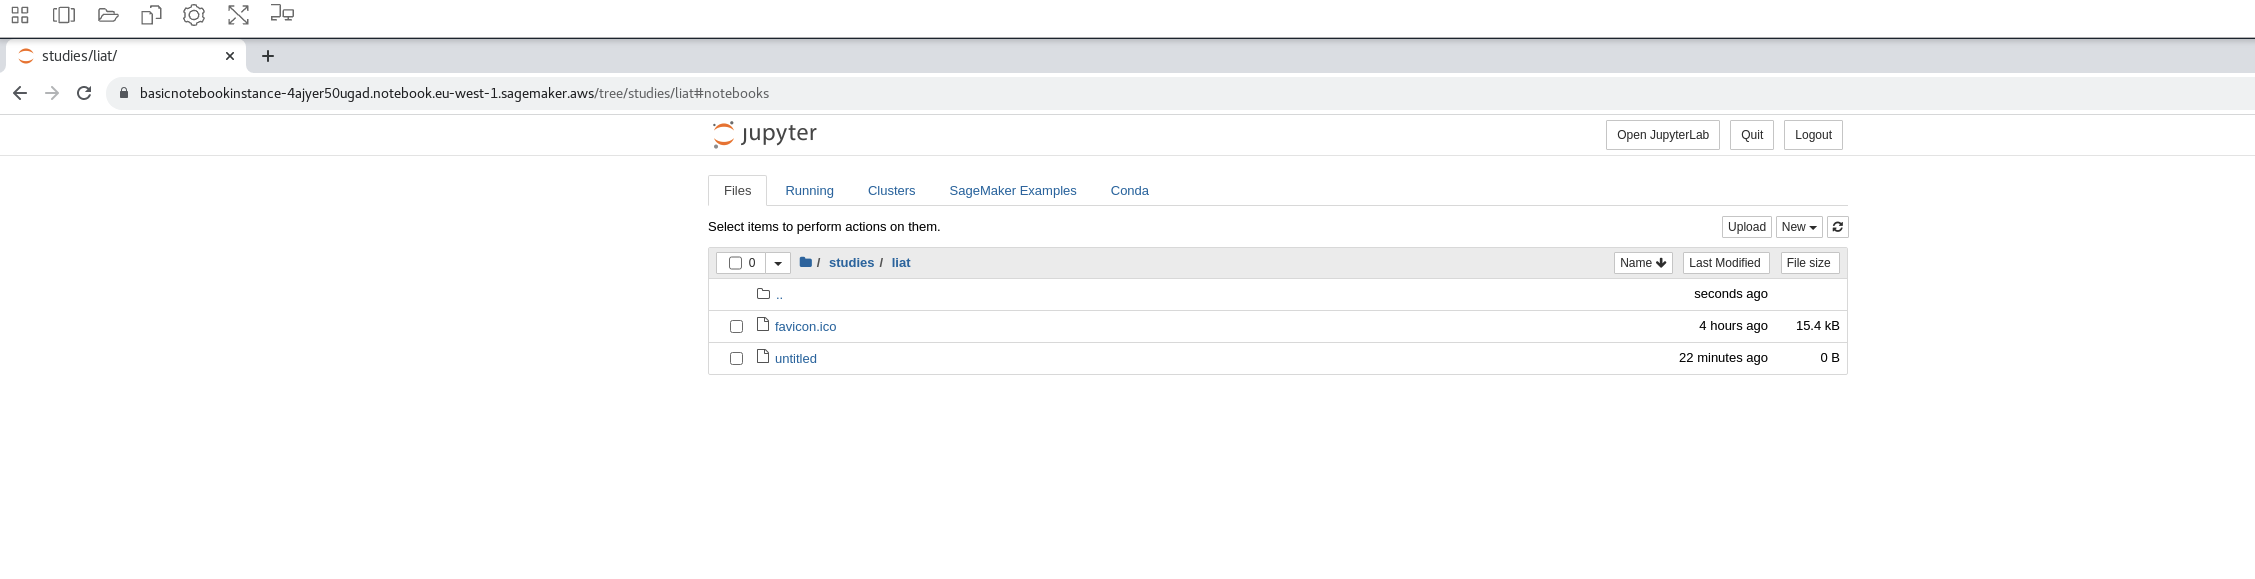 3. Open a new Jupyter notebook.
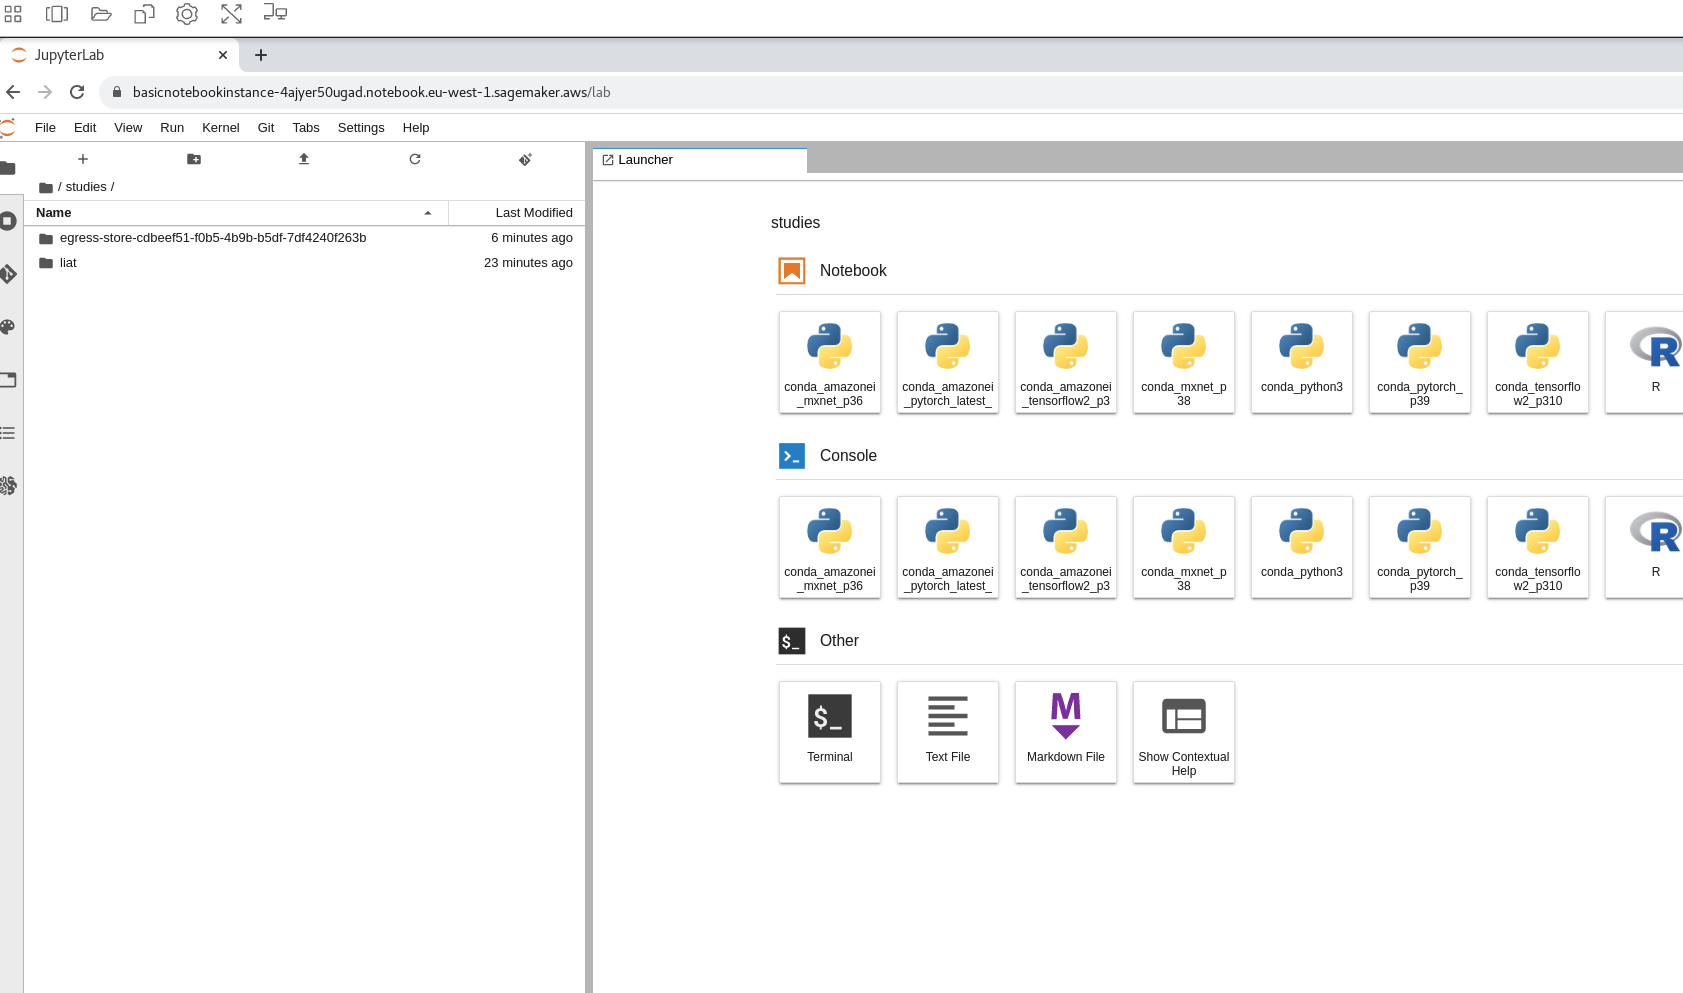
- Inside the one of the notebook cells, type
!pip3 install <package name>.
For any questions or help please contact: support@pheno.ai
Attach Files to a Research Environment
- Navigate to the Studies page using the menu on the left.
- Find the Study you want to attach files to and click Upload Files on the right.
- You can upload files either by dragging and dropping, or by clicking the Upload Files or Upload Folder button.

Collaborating and Sharing Data Between Environments
To share code with peers, make sure to include a common organizational Study when creating your workspace.
Inside the workspace, the shared folder will be located at /home/ec2-user/studies/<study name>.
In Jupyter’s file explorer, this will be under studies/<study name>.
Files included in this folder will be shared with researchers in your Organization.
When saving code and temporary data, we recommend saving code in outside of the studies folder, and only move them to the shared folder once you’de like to share amongst your peers.
Terminating a Research Environment
When you no longer need a Research Environment you can terminate it. Follow these steps:
- In the portal navigate to the Workspaces page using the menu on the left.
- In the list of Workspaces, find the Workspace that you want to terminate.
- Click on the Terminate button, the Workspace must be in the Ready state to terminate it.
Tools Installation
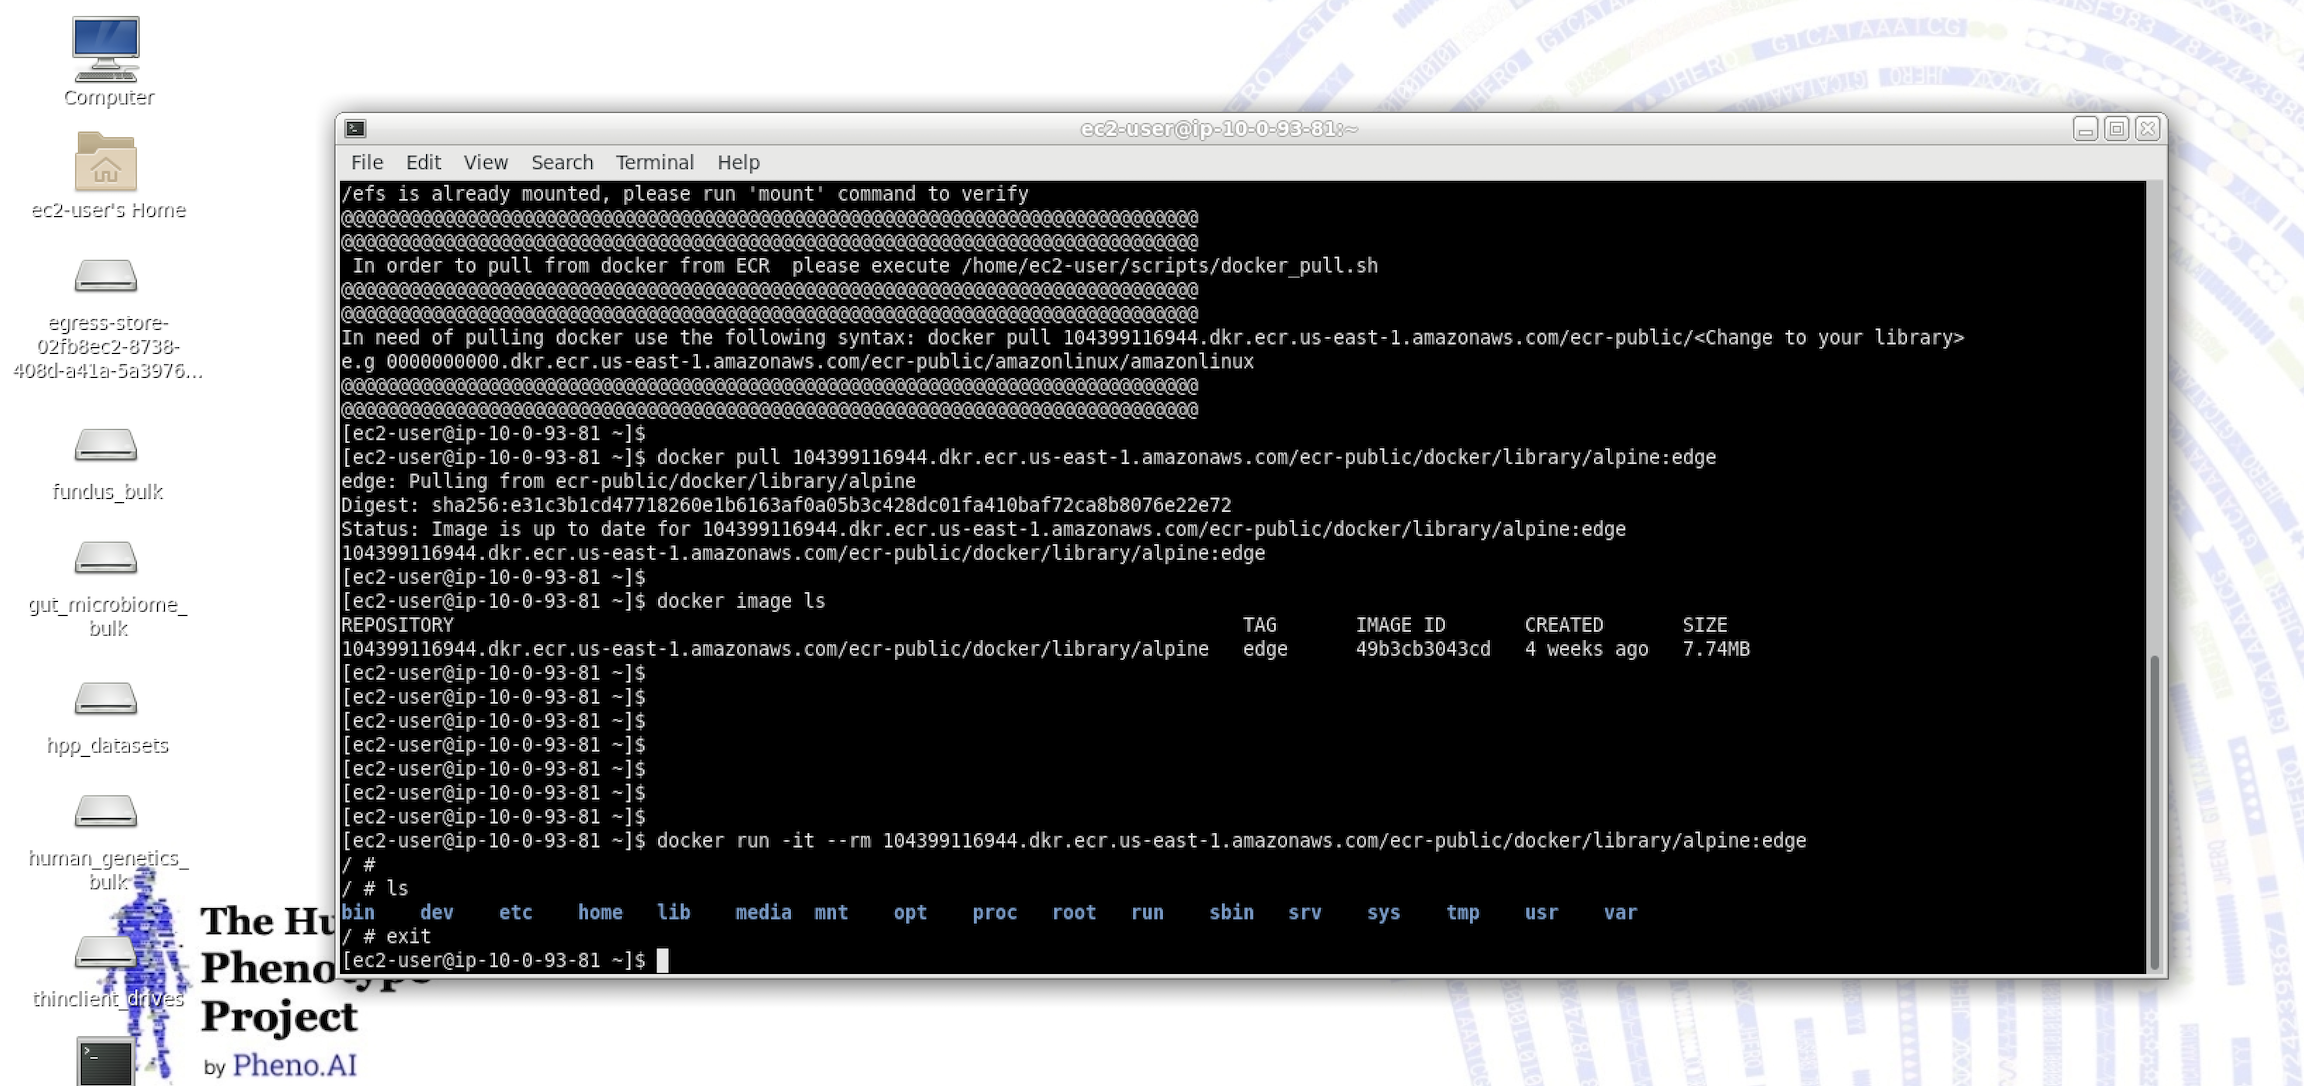
Docker usage
Docker pull
docker registry: https://gallery.ecr.aws/
Use the following code docker pull \<accountID\>.dkr.ecr.\<aws-region\>.amazonaws.com/ecr-public/\<Change to your library\> 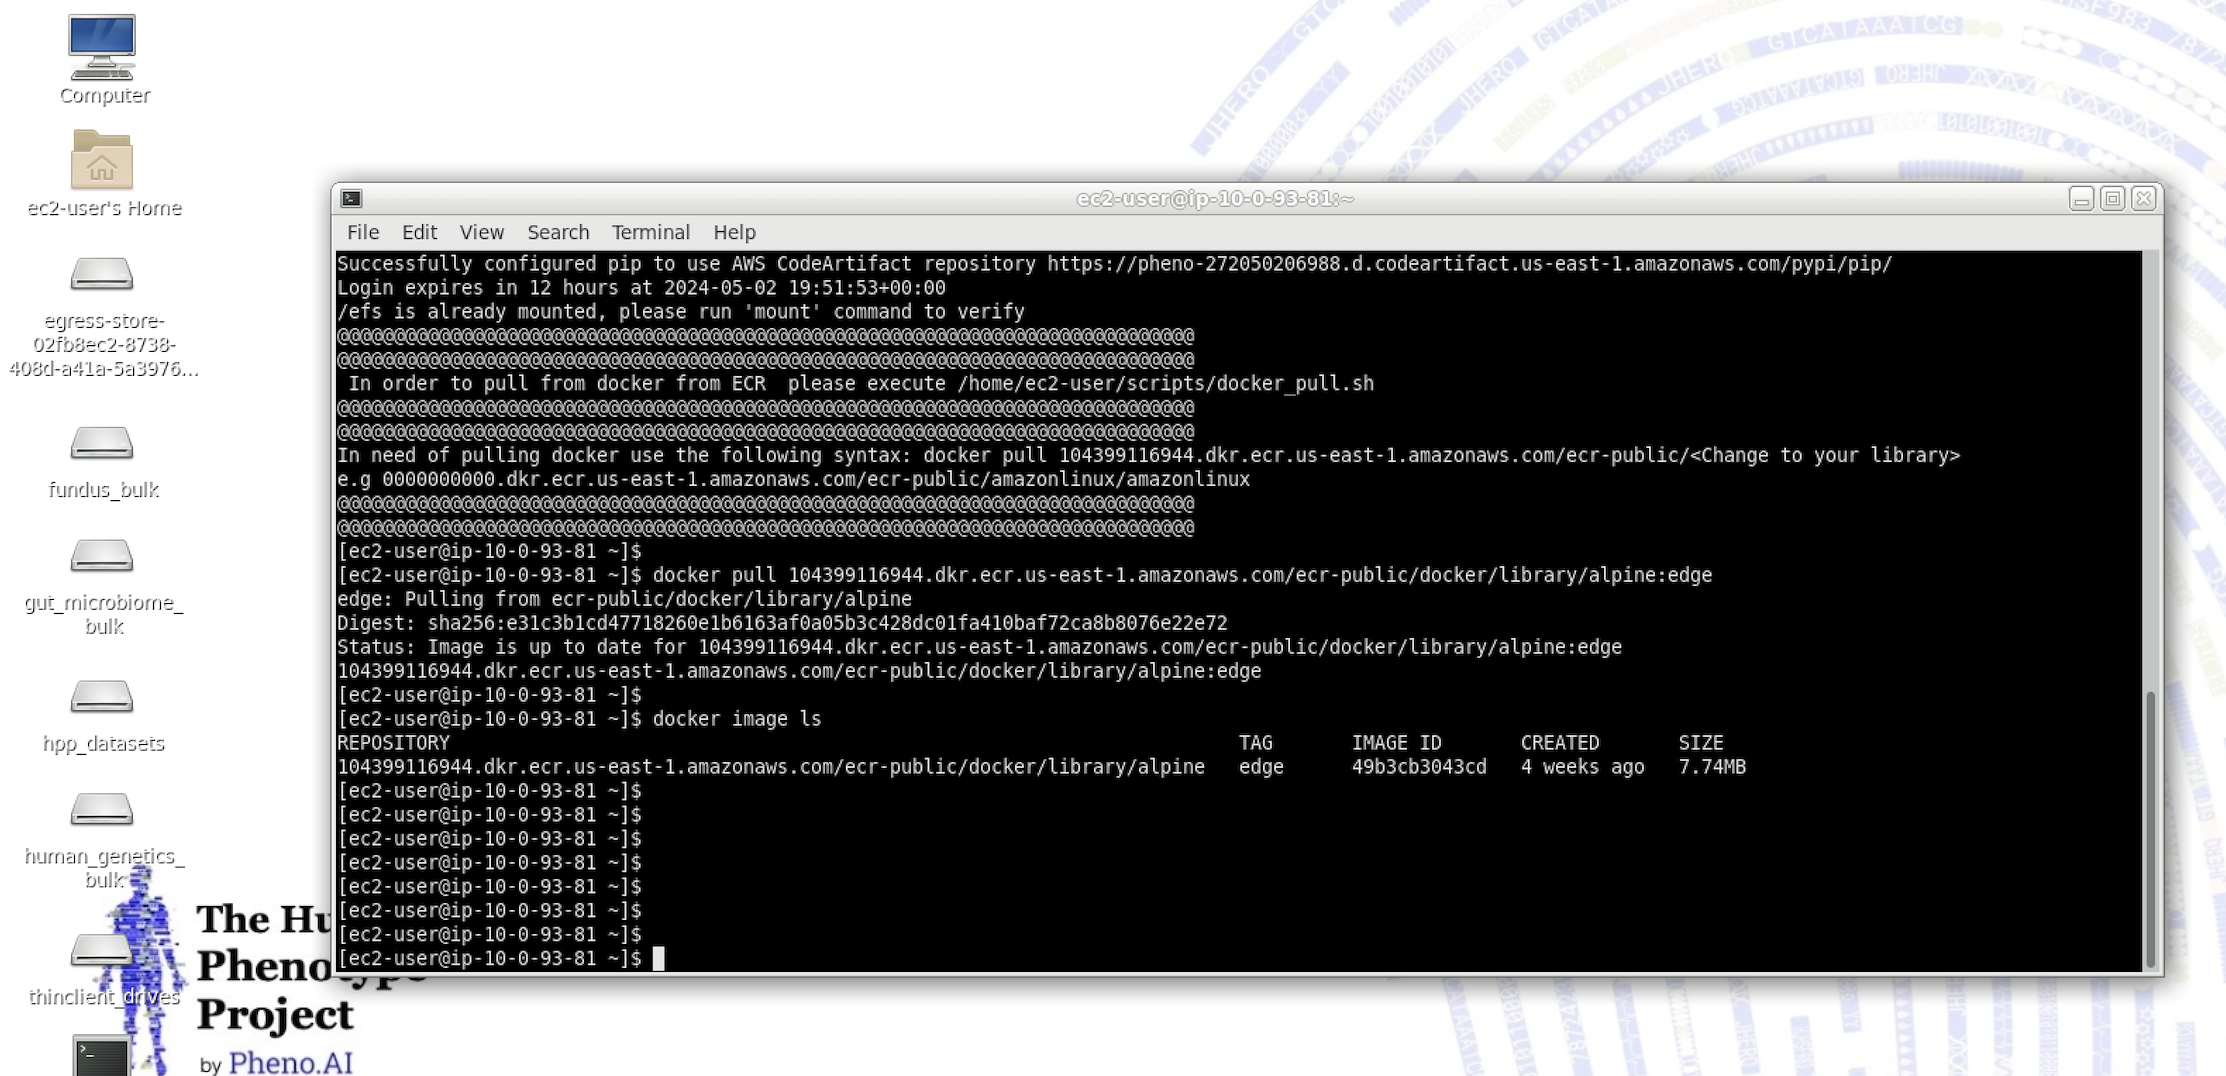
Docker run
Use the image you have under docker image ls
e.g docker run -it --rm \<accountID\>.dkr.ecr.\<aws-region\>.amazonaws.com/ecr-public/docker/library/alpine:edge